Annotation Worklists
This is the reference material for creating and managing an annotation worklist. For reference material on doing the annotation itself, see Performing Annotation.
An annotation worklist is a set of images, along with specific ways you want the images annotated (called “annotation specifications”, or just “specifications”). The worklist can then be sent to other contributors for annotation.
Worklists are managed from the Annotation Worklists tab on the project page.

Creating an Annotation Worklist
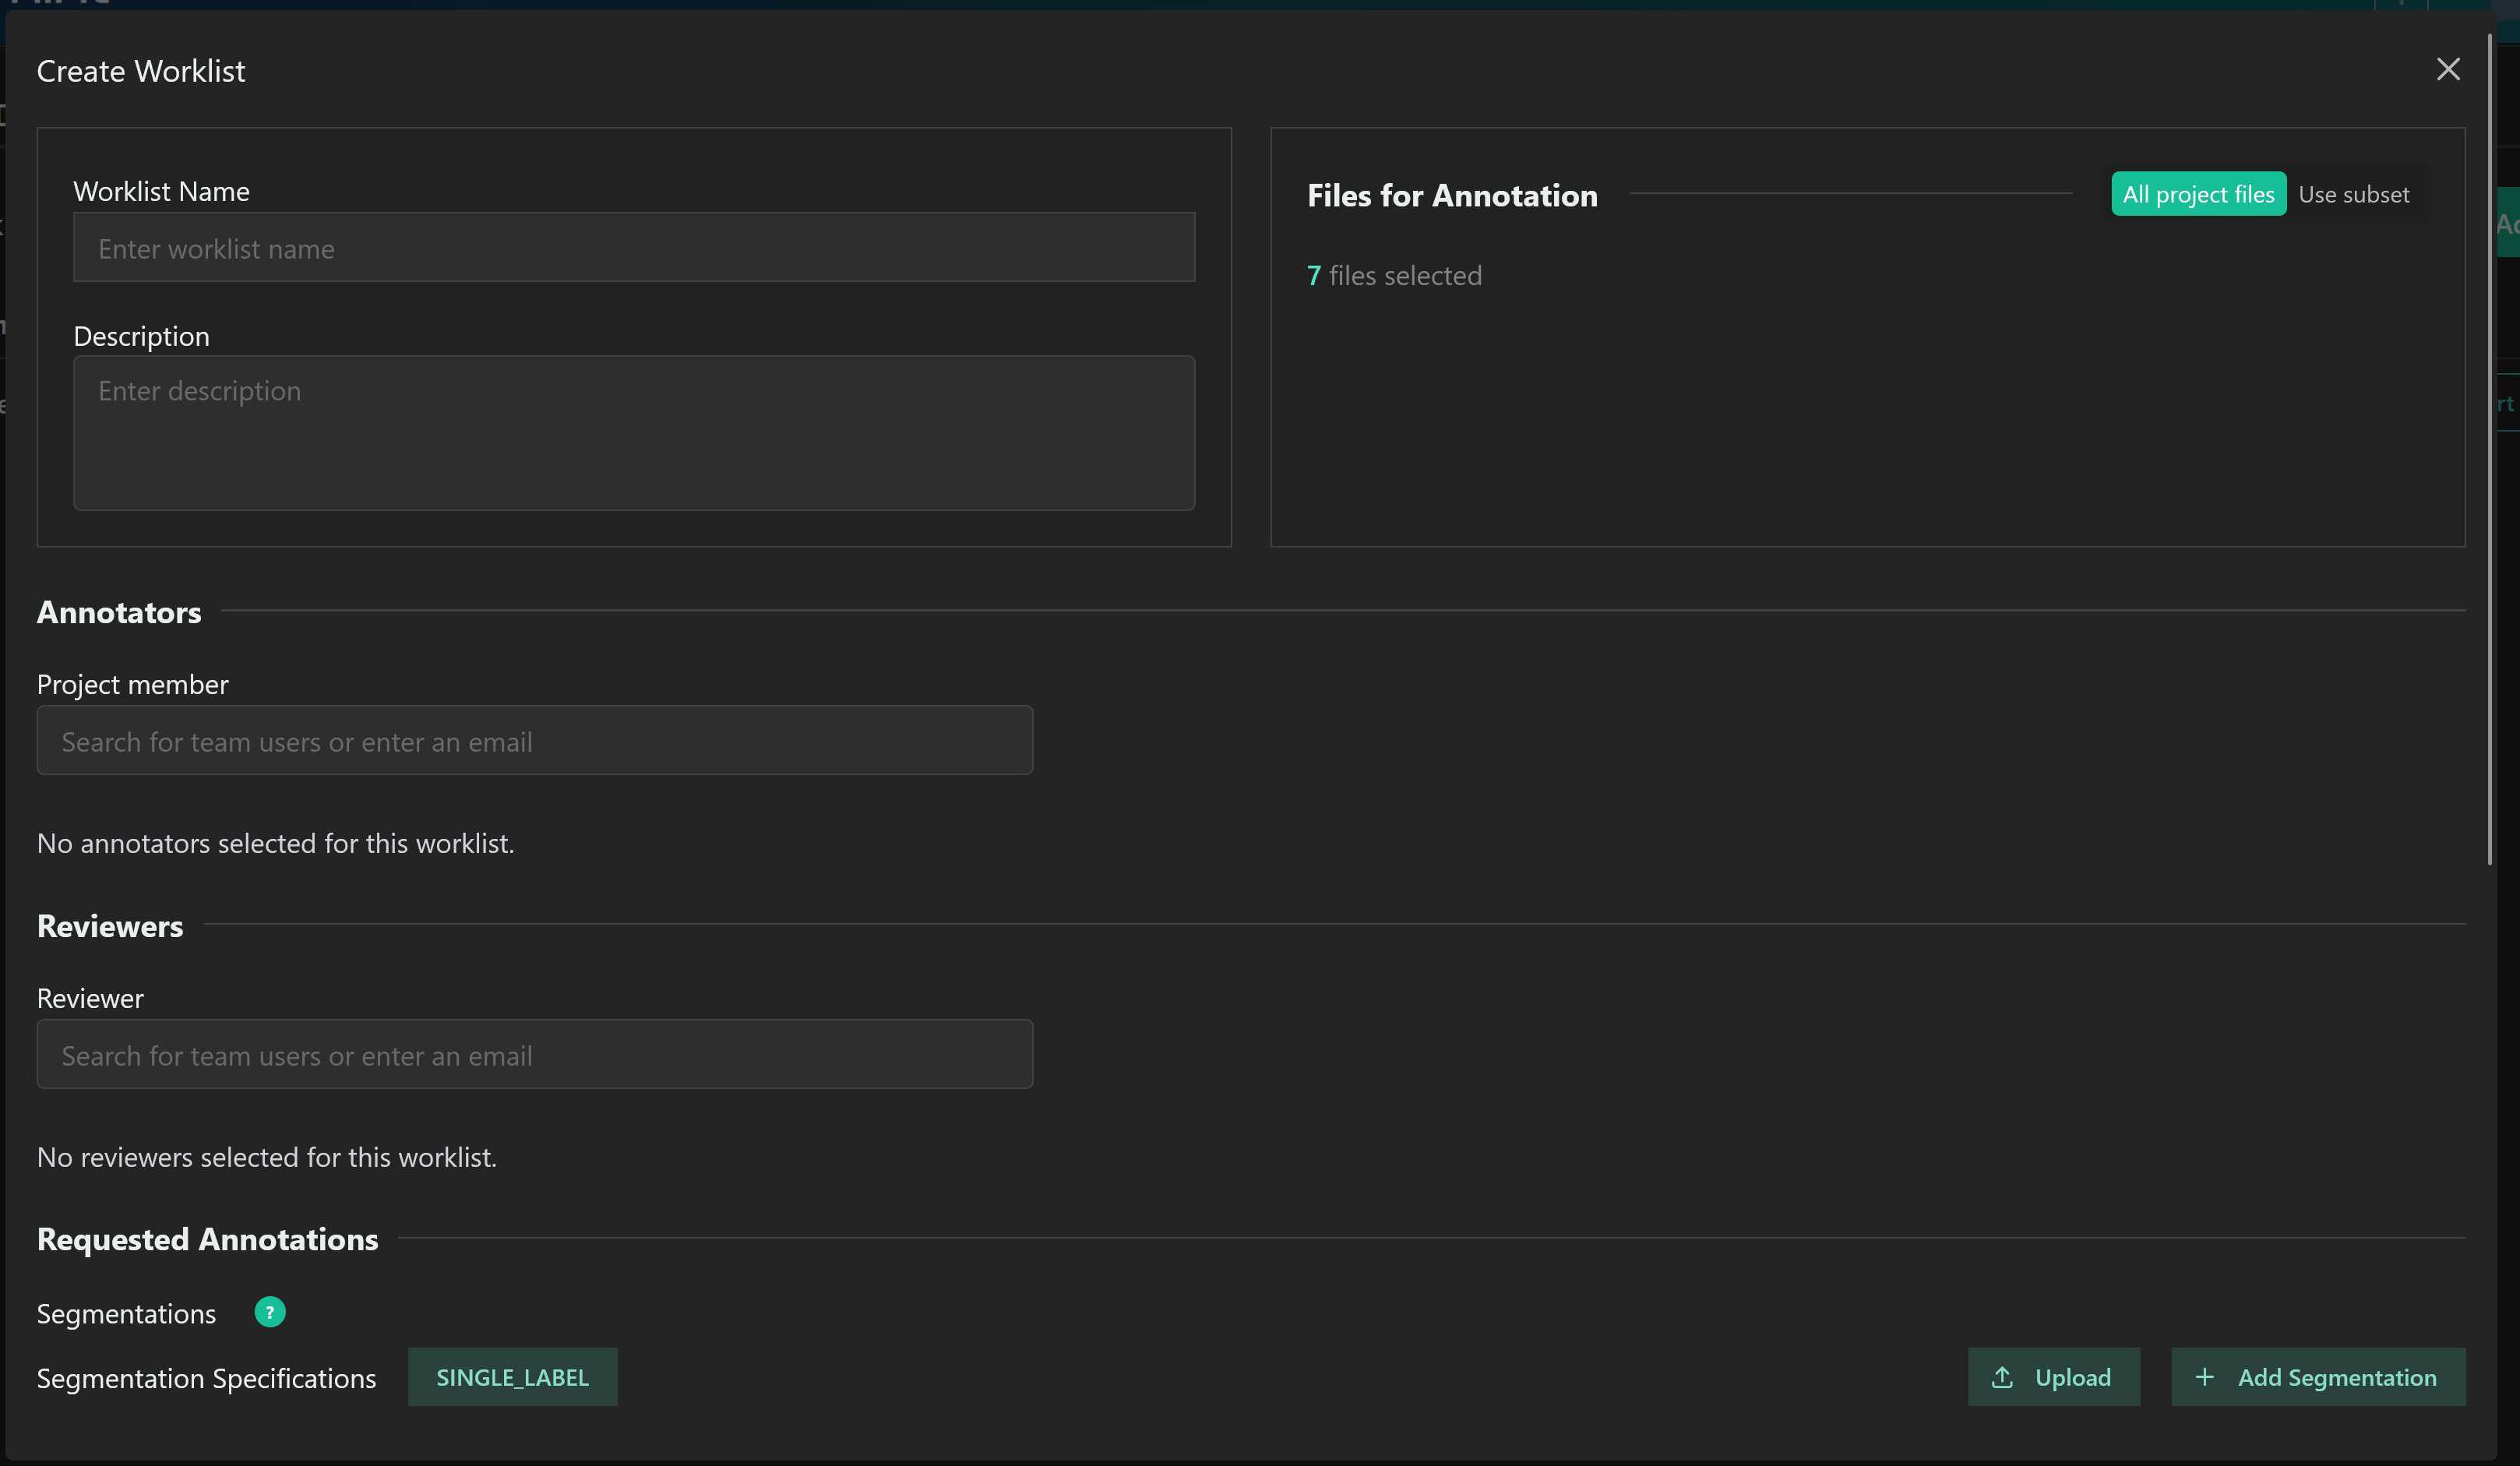
To create an annotation worklist, press the Add Worklist button. You will see a dialog box like this:
Adding Files
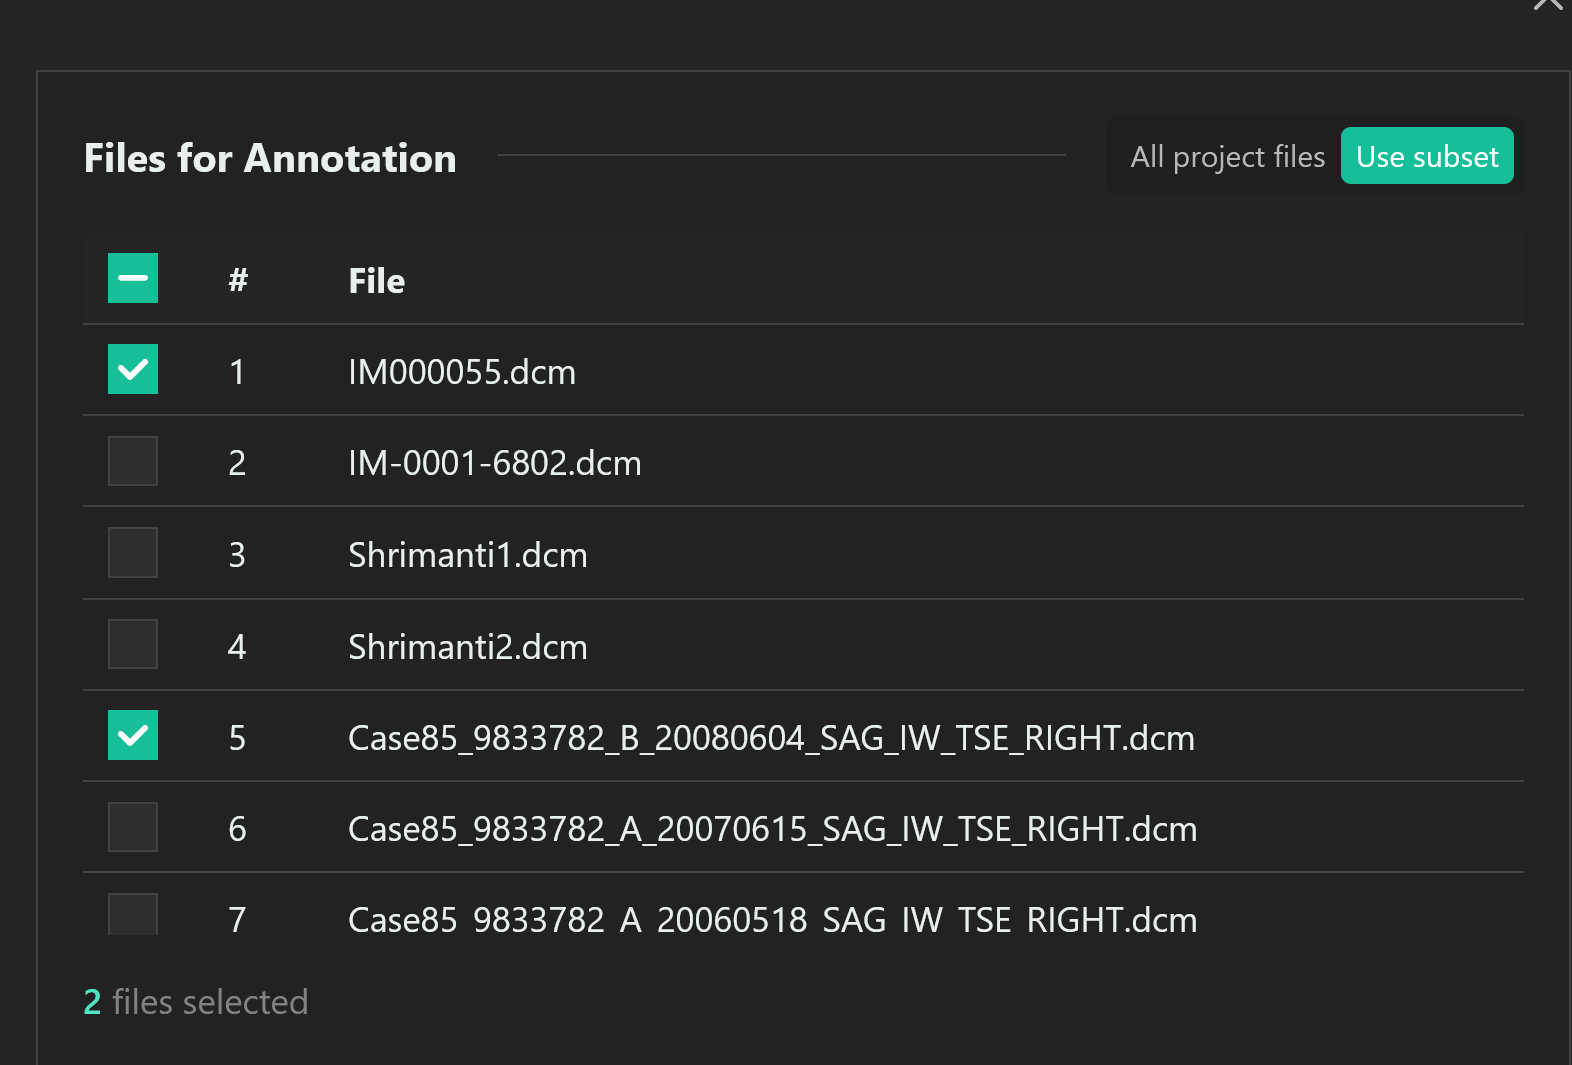
An annotation worklist includes a set of project files to be annotated. This can be all the files in the project, or a selected subset.
The box on the right allows you to add files to the worklist for annotation. To add files to a worklist, they must already be uploaded to the project. For information on uploading files, see Project Files.
By default, all files in the project will be added. If you only want to select some, click “Use Subset”, and then tick the boxes of the files you wish to use.
Annotators and Reviewers
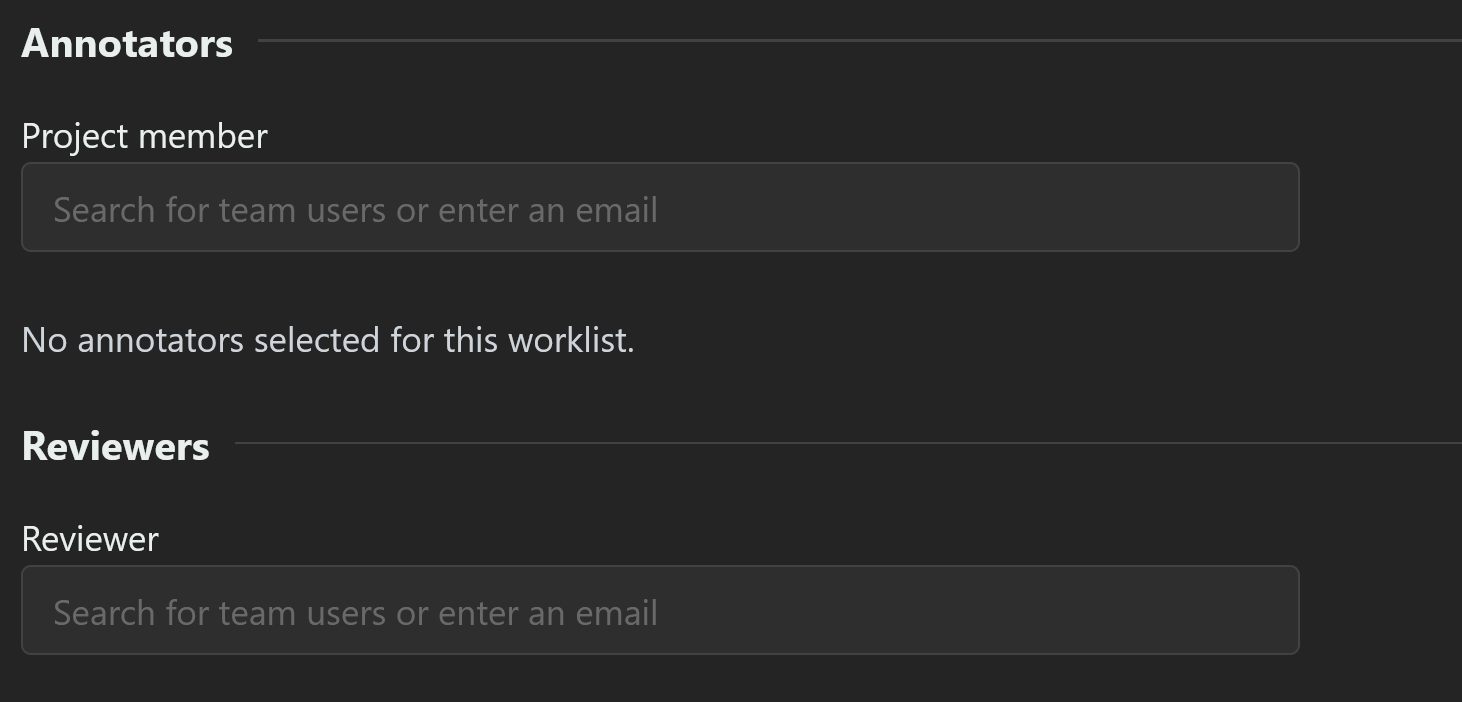
To add annotators or reviewers, enter their email addresses in the relevant boxes. If they’re already in the project, they’ll be addded automatically. If not, they’ll be sent an email invitation and added when they accept.
Annotators will annotate images in the project. New annotations can be either accepted for model training immediately, or they might need to be reviewed by an expert before they can be included in the training set. If you tick the “Requires Review” box, their annotations must be reviewed before they are included in the training data. Otherwise, they will be accepted automatically.
If someone is included as a reviewer, they will see annotated images that are waiting for review, and will be able to approve them, send them back for revisions, or reject the annotations completely.
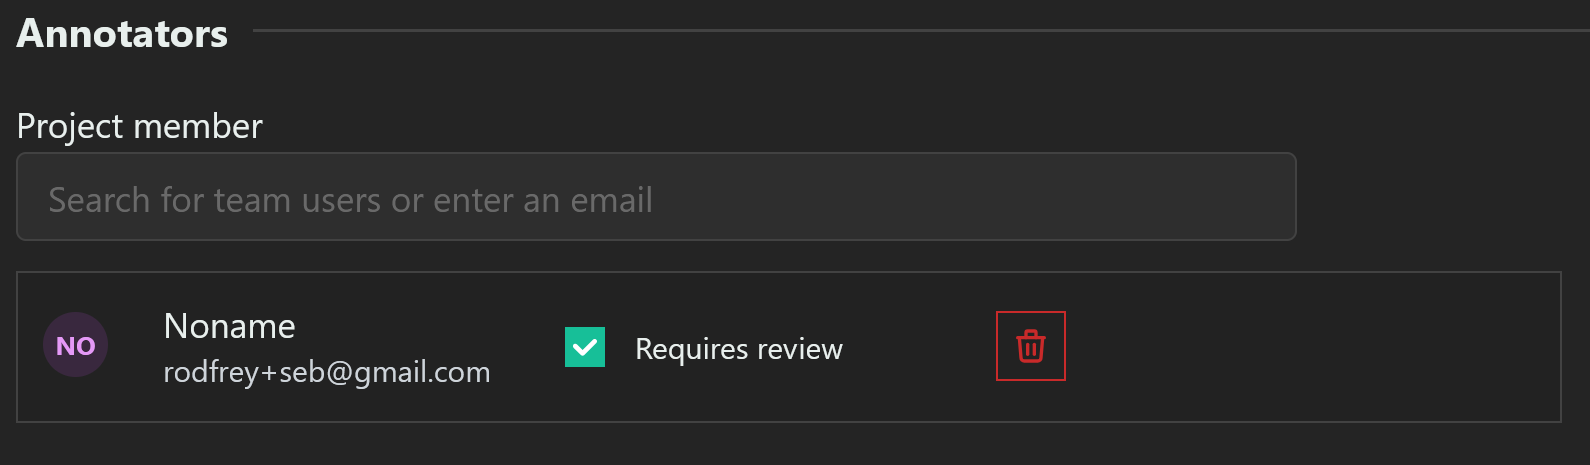
Add Reviewers to review annotators’ work. You can add someone as both an annotator and a reviewer, if you want them to annotate the files themselves but also review the work of others.
Requesting Annotations
The Requested Annotations section allows you to create annotation specifications, which specify what the annotators need to mark. Annotation specifications are divided into four categories: Segmentations, Labels, Classifications, and Shapes and Regions. For more information on how these tools work, see Performing Annotation.
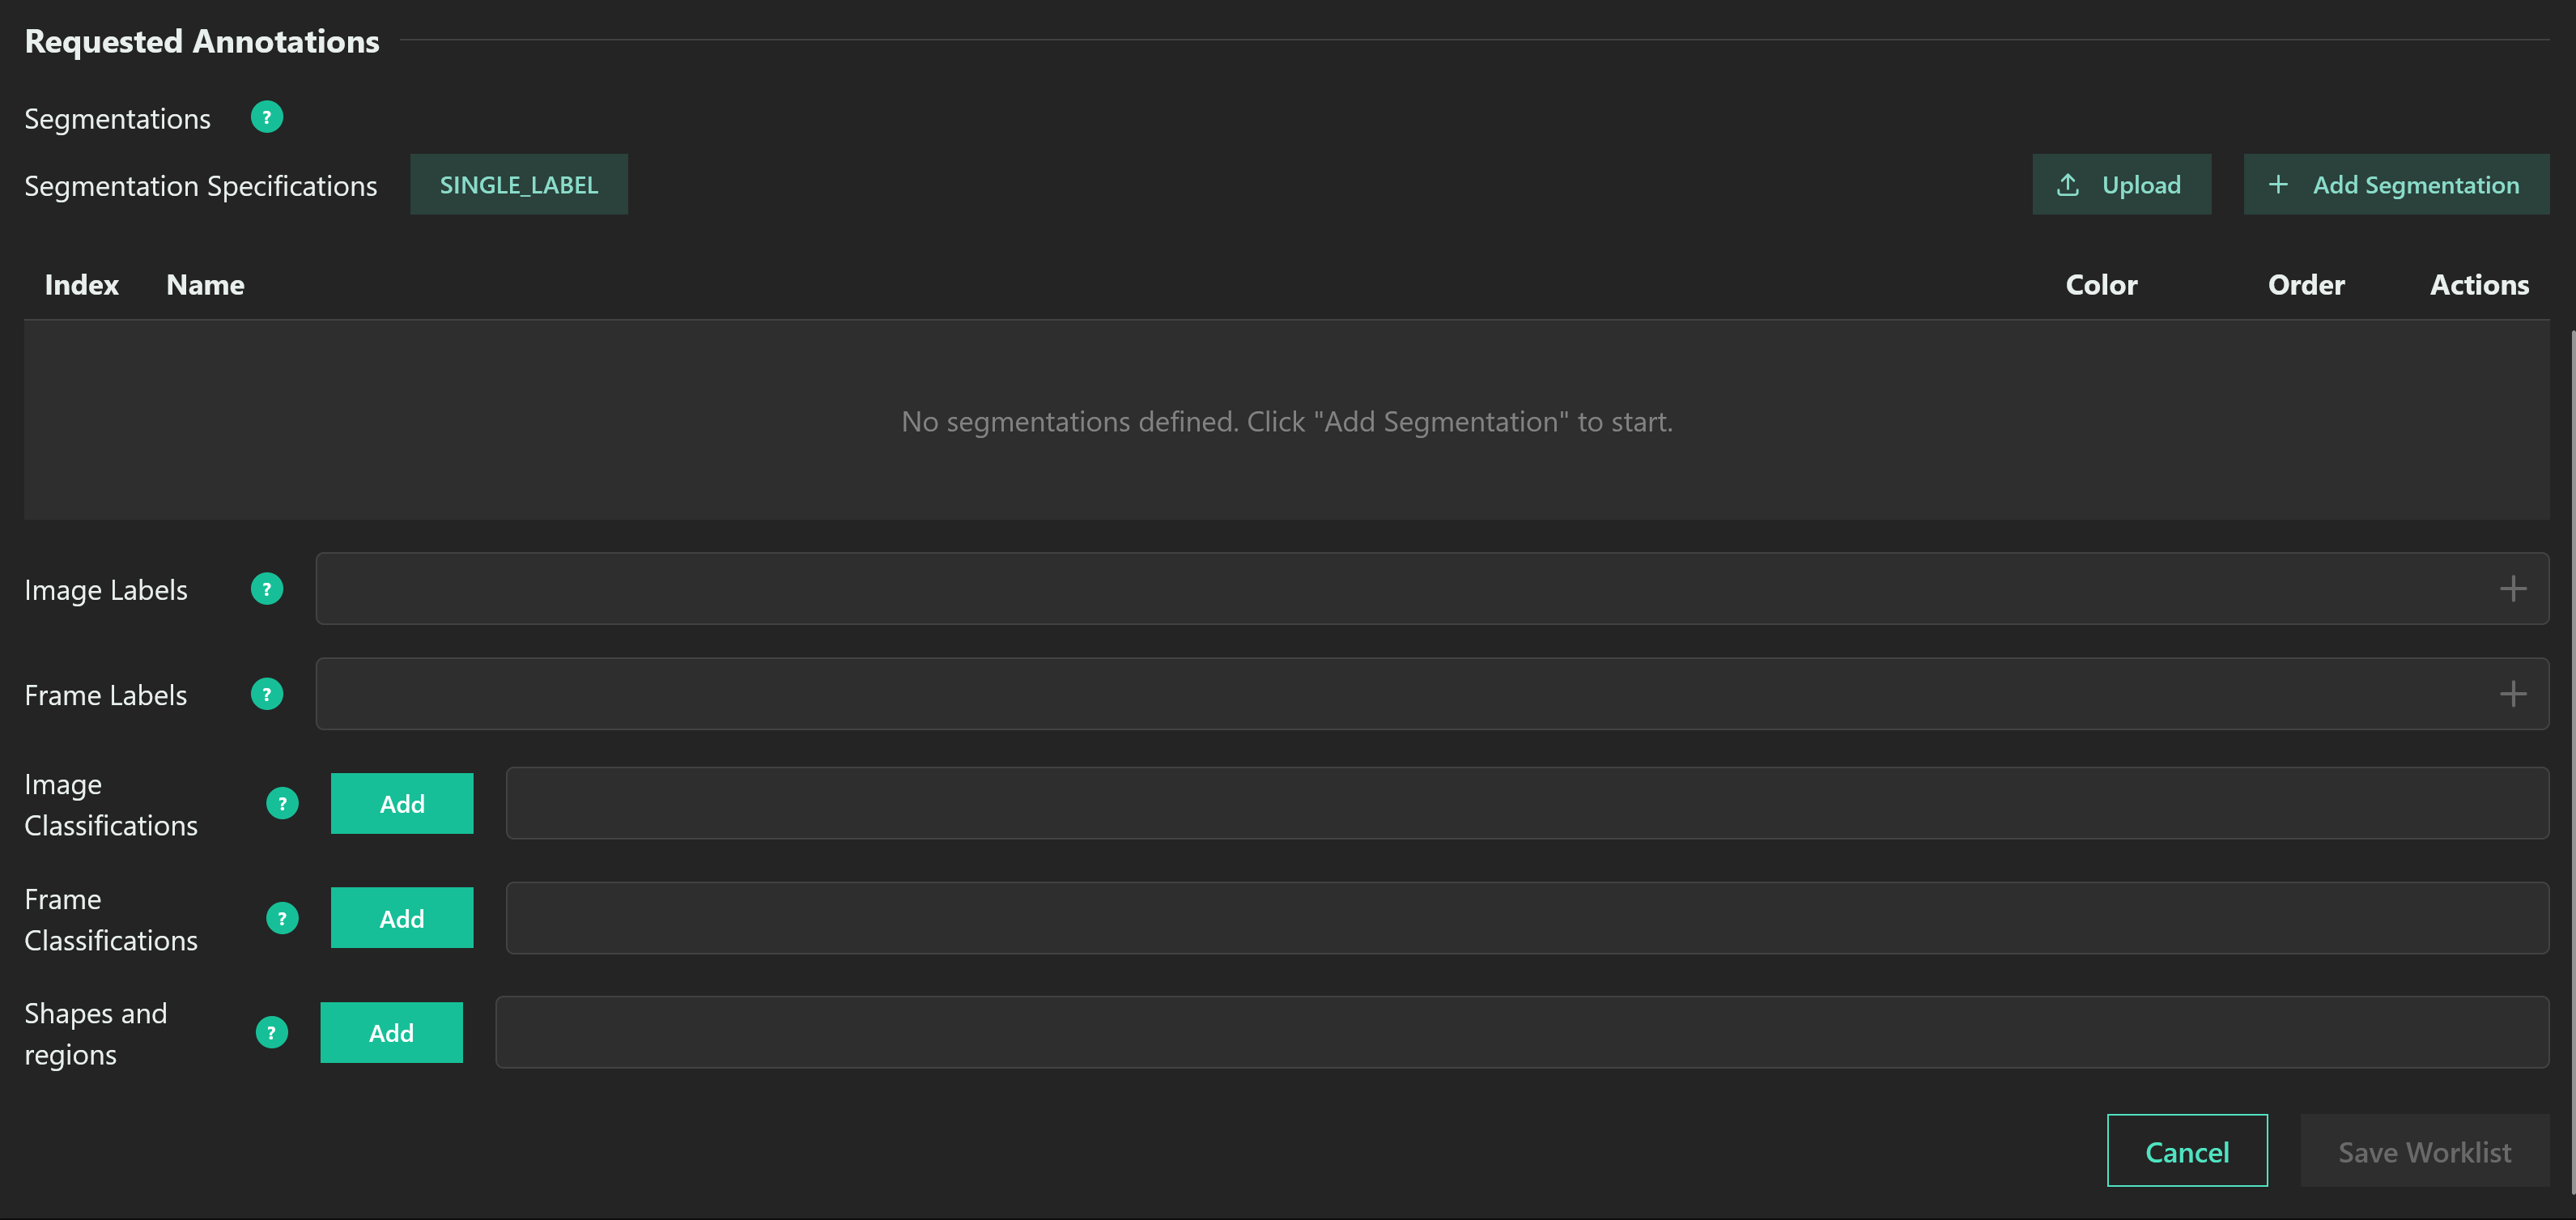
Segmentations
Segmentations classify an image pixel-by-pixel. They can be used in 2D and 3D scans.
You can have multiple segmentations specifications in a single worklist. With the SINGLE_LABEL option selected (which is the default), a given pixel can only belong to one segmentation, meaning segmentations can’t overlap. By selecting the MULTI_LABEL option, you can allow segmentions to overlap.
Click the “Add Segmentation” button to create a new segmentation specification. You can then set its name and colour. It’s a good idea to pick a name which makes the purpose obvious to annotators.
Labels
Labels are a binary (true/false) classification for an image. Labels appear to annotators as checkboxes, and separate scans into belonging to a certaing category, or not. To create a label specification, type the label name into the text box and press Enter.

Image labels apply to an entire scan. Frame labels apply to a single frame at a time. Single-frame scans should only use image labels.
Classifications
Classifications are similar to labels, but instead of only being yes-or-no, they can have multiple options. To create a classifcation specification, press Add, enter the name, and then input several classes (options), pressing Enter between them.
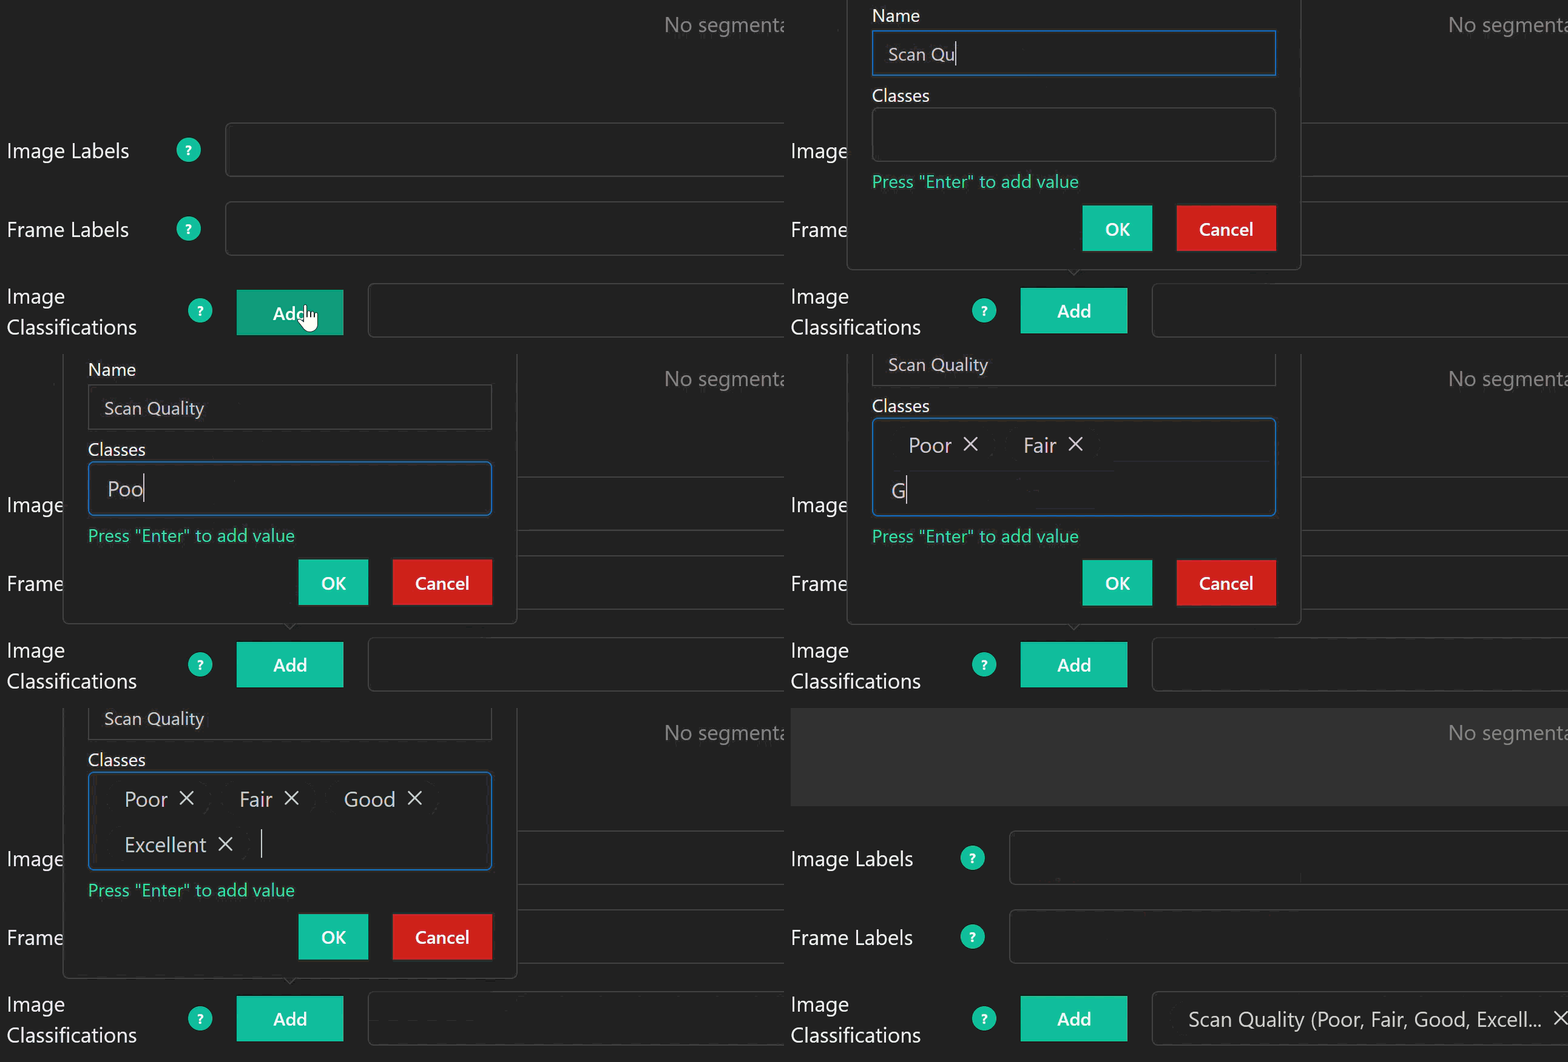
Like labels, classifications can be made on a per-frame or per-image basis.
Shapes and Regions
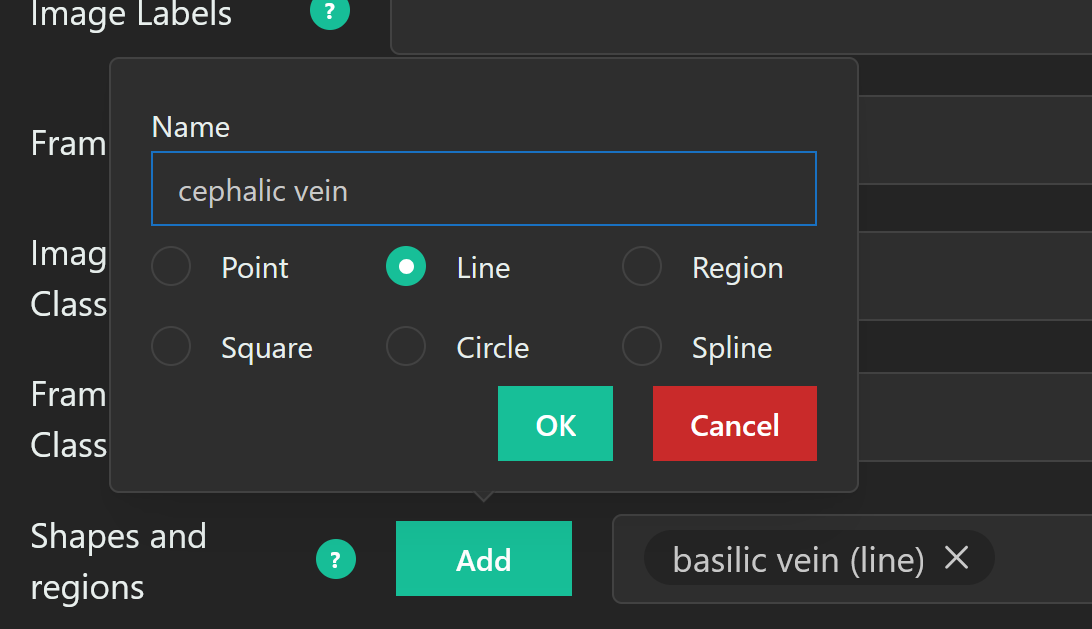
Shapes and regions allow annotators to draw with geometry, rather than colouring pixels. Each shape/region class can only be used once per frame. If you want annotators to draw three lines, you must create three unique line shapes.
To create one, press Add, select the desired geometry, and enter a name.
Managing the Worklist
Once an annotation worklist is created, it will be visible in the Annotation Worklists tab, and can be managed in various ways.
Review and Annotate
The Review and Annotate buttons allow you to review your annotators’ work or annotate yourself. For more information on these workflows, see Performing Annotation.
Status Report
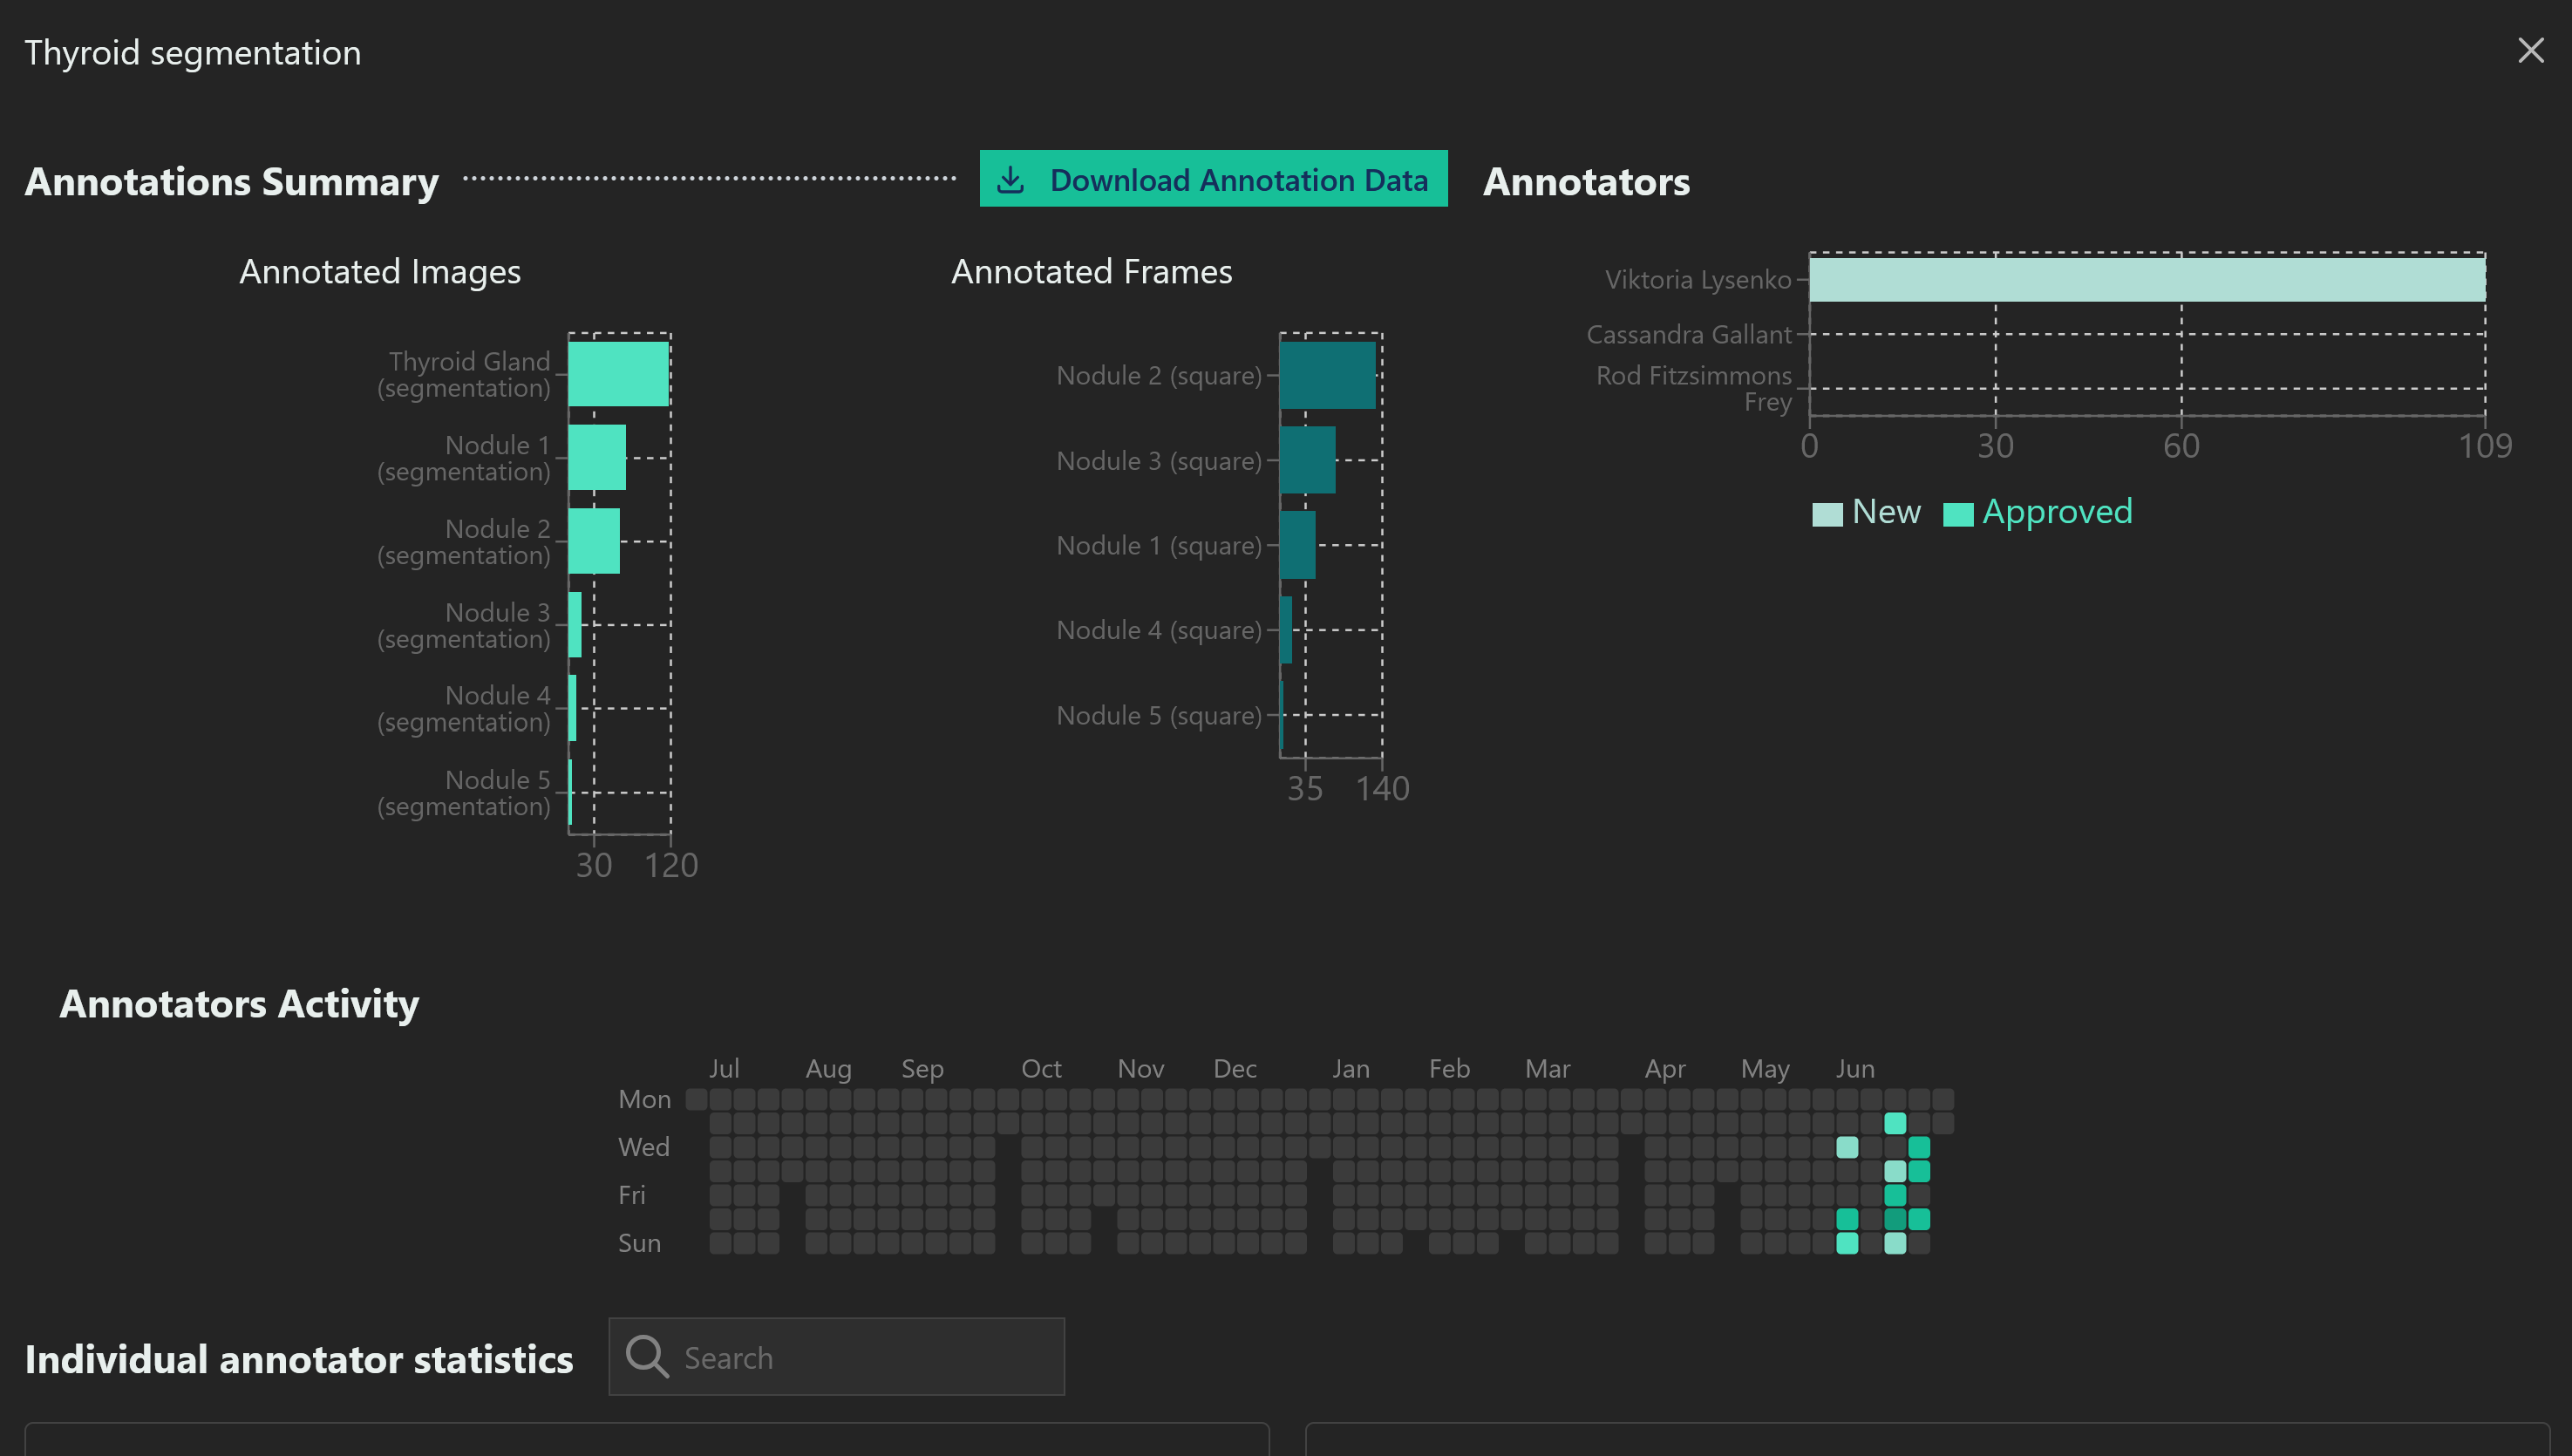
The Status Report shows graphs indicating how many of the assigned annotations are done, and when they were completed. You can also see work done by specific annotators.
Sumamry Graphs
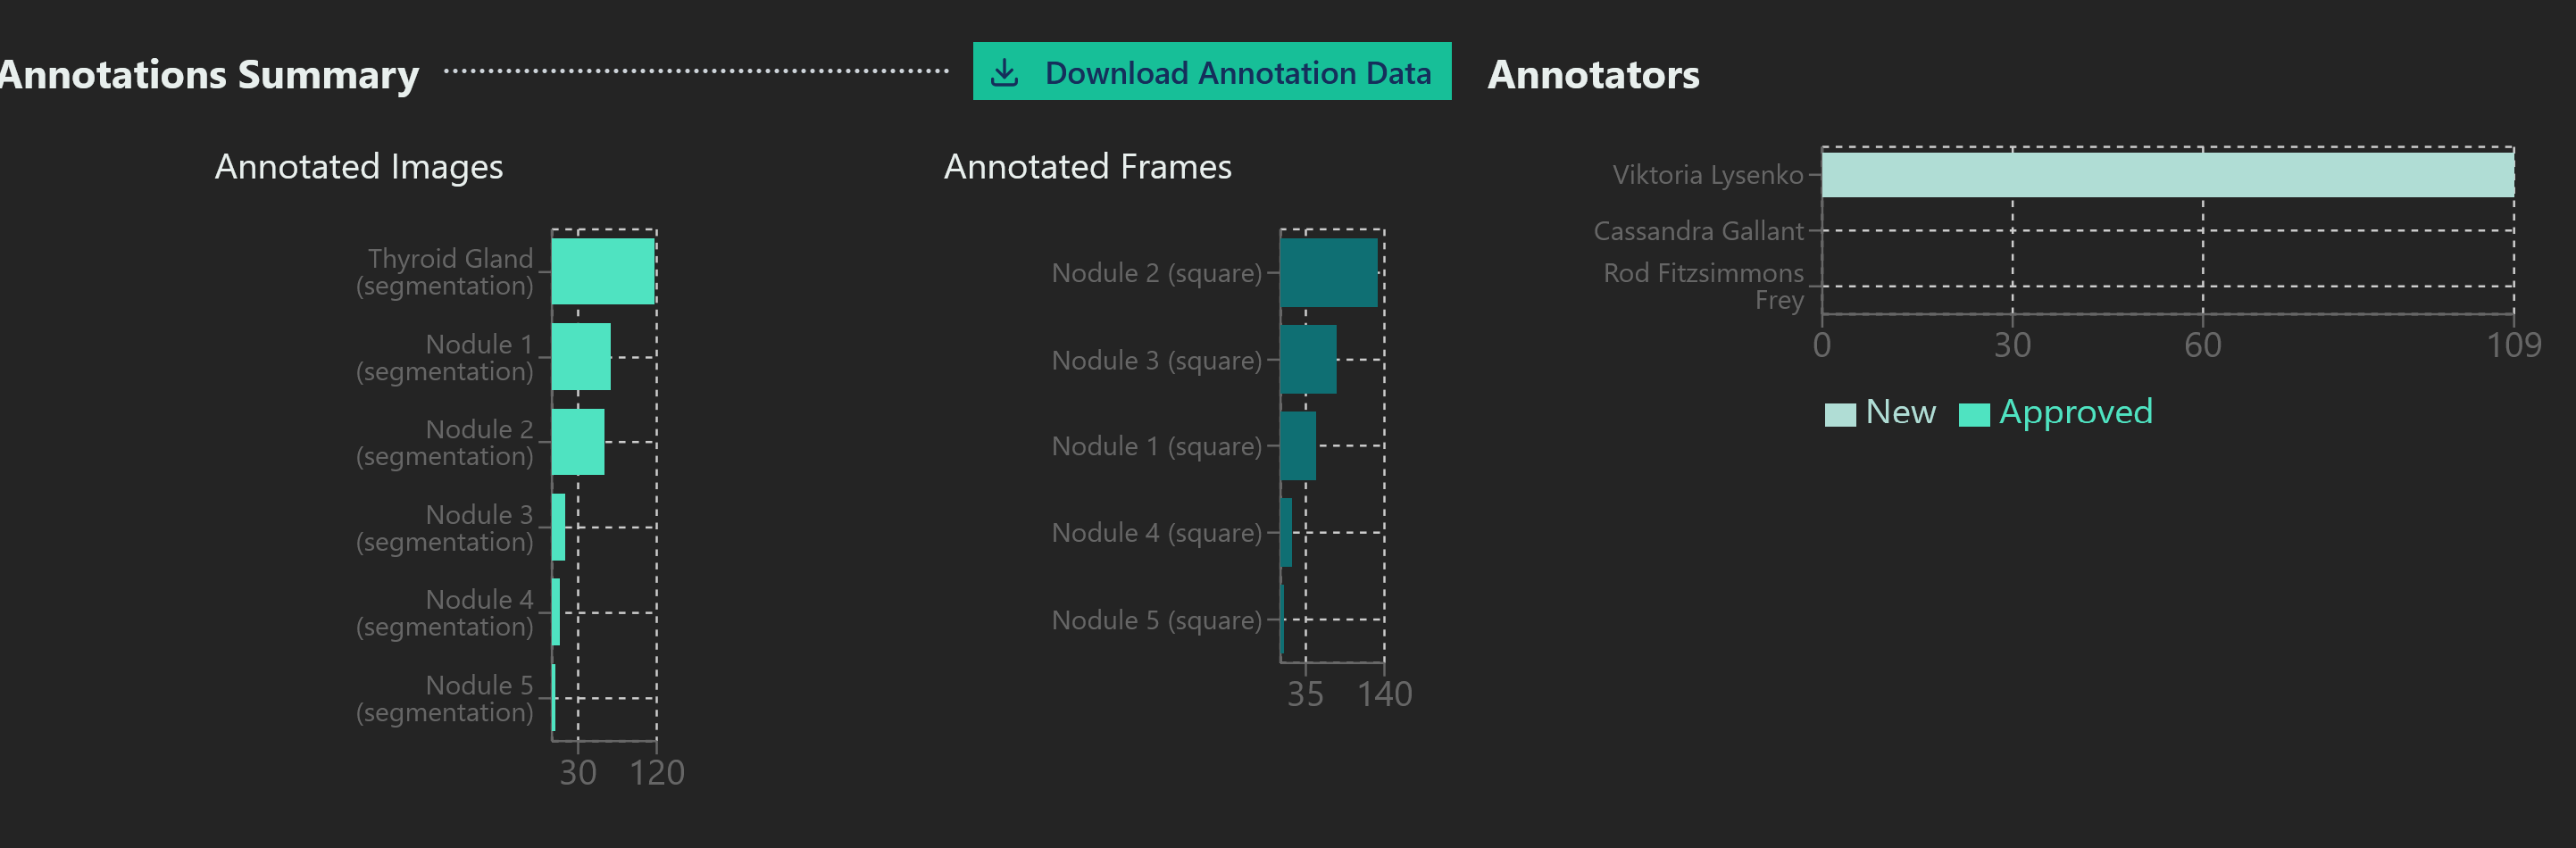
The first row of graphs shows how much work has been done on each annotation and by each annotator.
The first graph shows, for each assigned annotation specification, how many images have been annotated. The second graph shows the same, but per frame. If ten separate frames in a single image were annotated, the first graph would count that as 1, the second graph would count it as 10.
The third graph shows how much work has been done by each annotator.
Activity Graph

The second row shows activity over time. It is laid out like a calendar, with each square a single date. Grey means no work was done. If work was done, the box is coloured green. Darker greens mean more work.
You can hover the mouse over a square to see a breakdown of how much work was done on that day by each annotator, and the type of work (Closed, annotated, and approved). TODO: What does this mean?
Individual Statistics
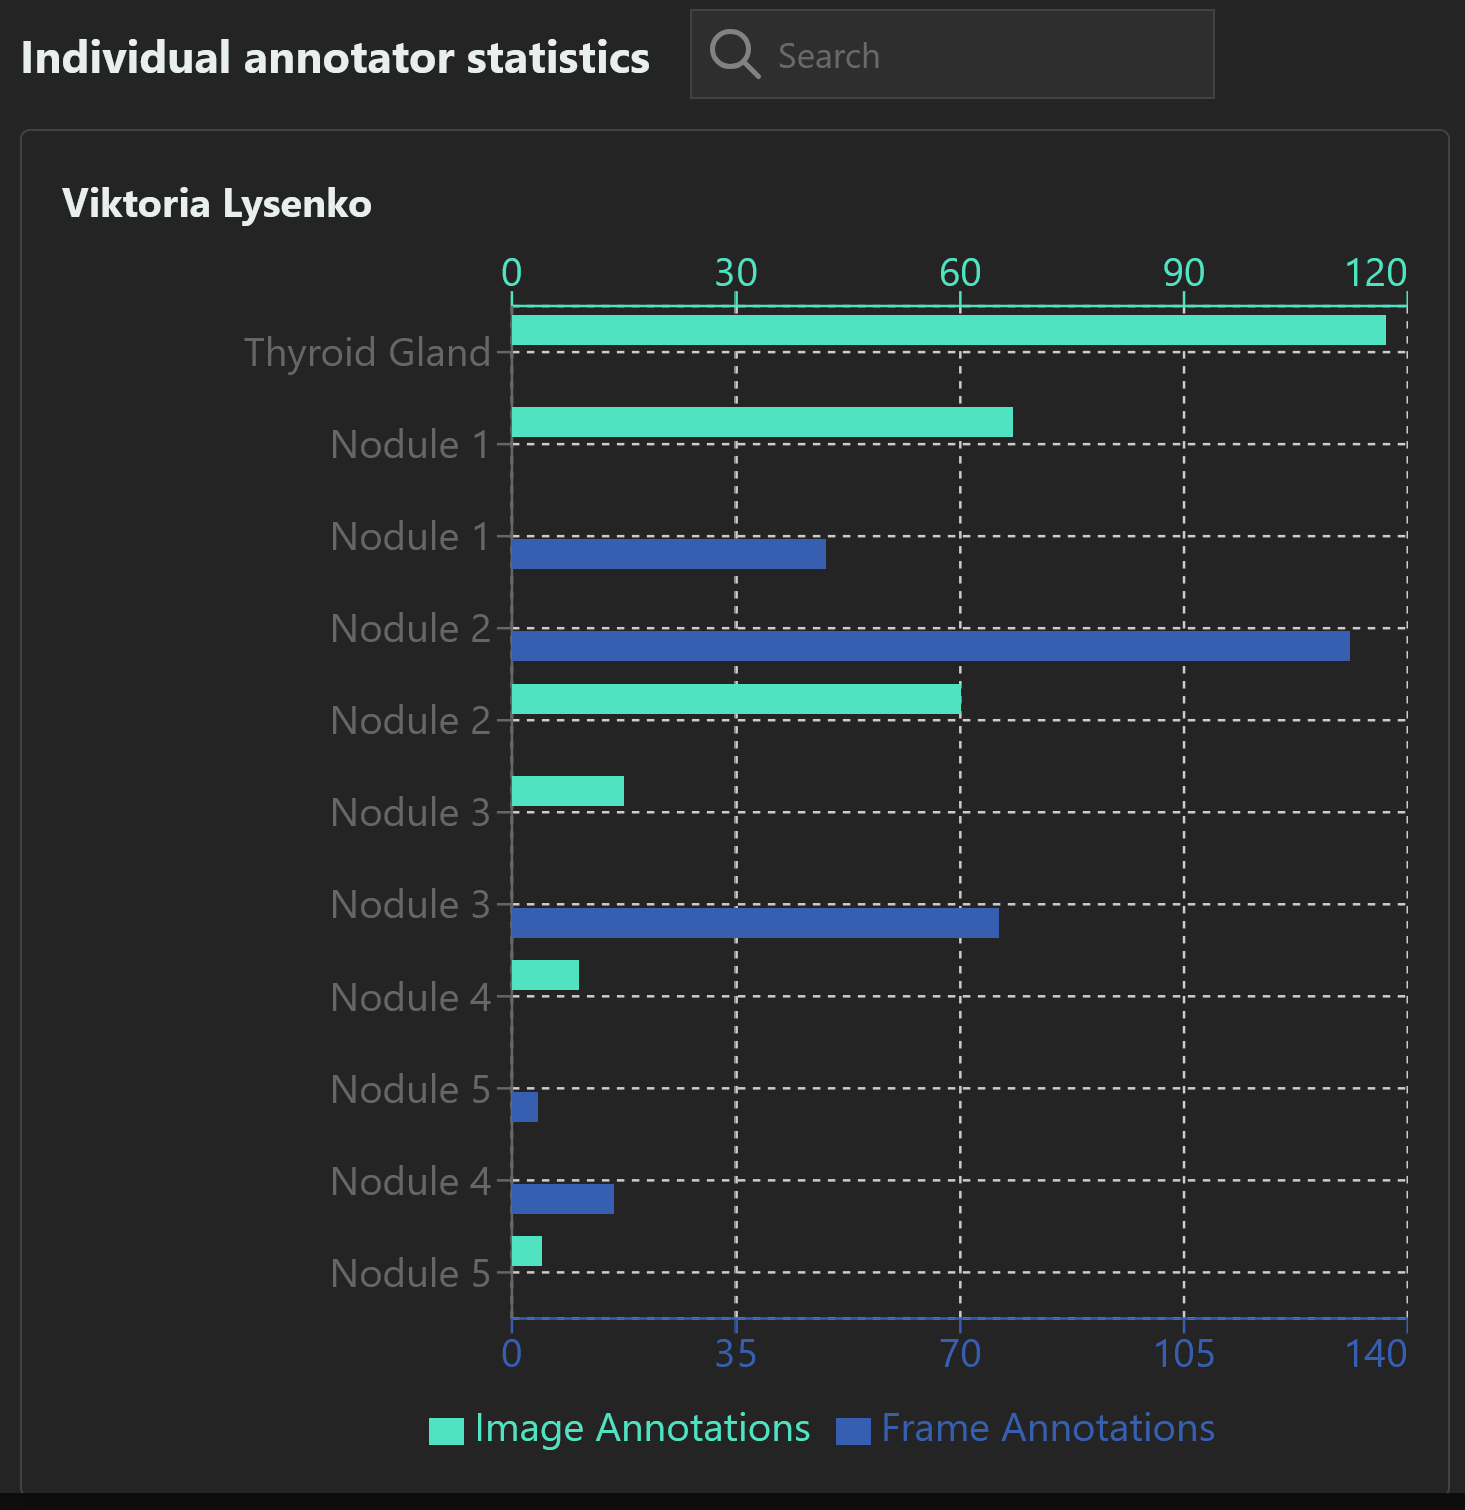
The final row shows the total work done by each individual annotator. The graph shows how many images and frames have been annotated with each annotation. If you have a lot of annotators, you can use the search box to search by name or email.
Downloading Annotation Data
The Download Annotation Data button (in the Status Report) allows you to download information about submitted annotations in a spreadsheet. This spreadsheet will contain all the information you need to do your own statistical analysis on the annotations using Excel, R, or any other program of your choice.
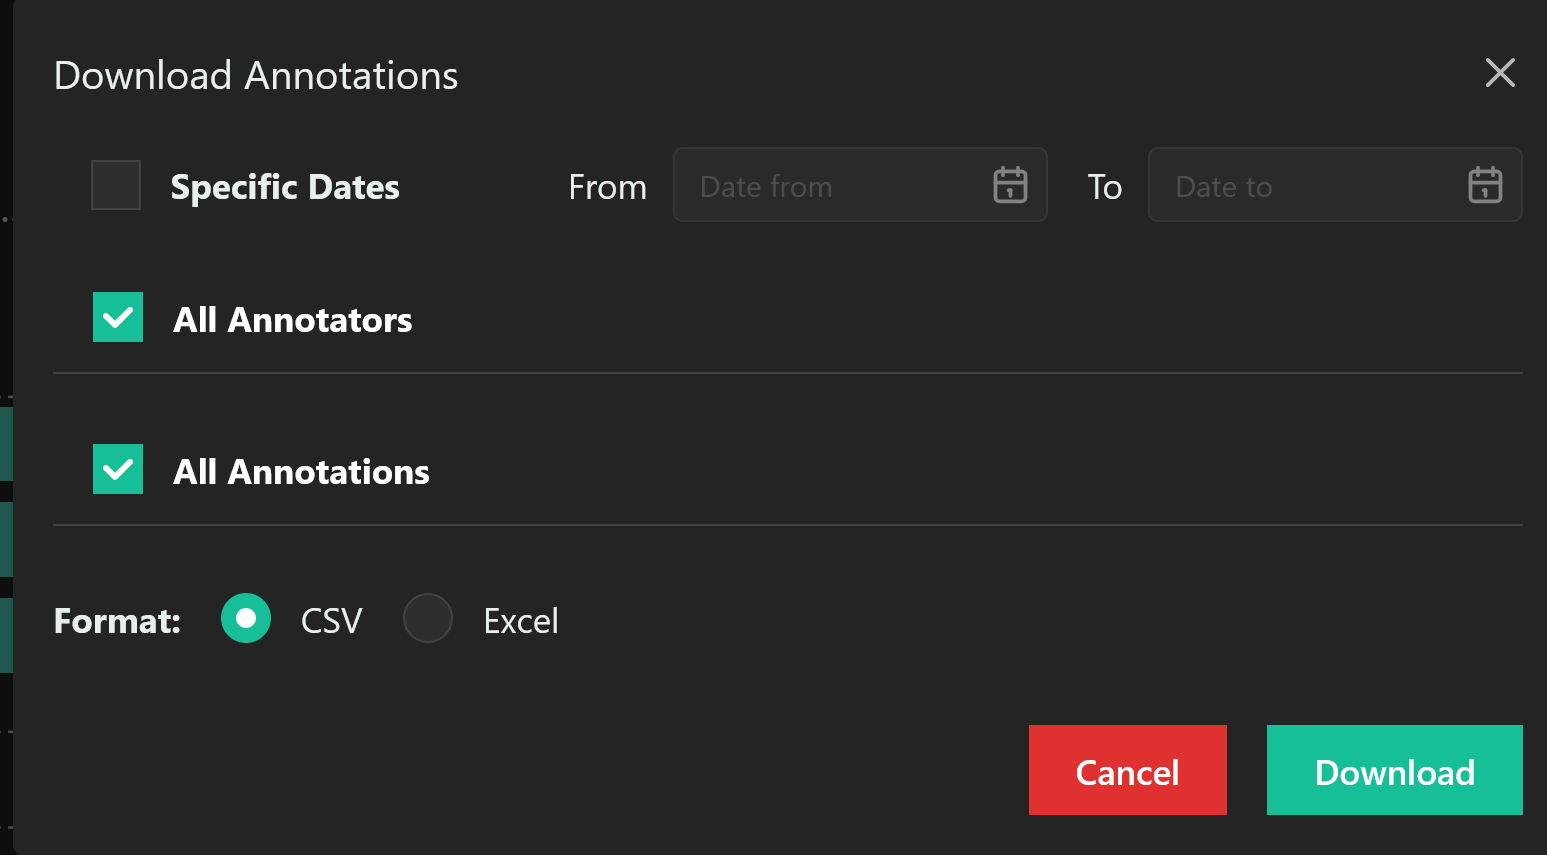
By default, you will download all annotations that have been contributed to the worklist. By deselecting the “All Annotators” or “All Annotations” boxes, you can instead only select annotations from specific contributors, or specific annotations to download.

The spreadsheet contains a row for each completed annotation: a segmentation in a specific frame, a classification of an image, and so on. If an image or frame has been annotated by multiple contributors, each contributor’s annotation will be its own row.
If you download an Excel file, there will be additional spreadsheets with only specific annotation classes, or only work by specific annotators. A .csv file will only contain the main spreadsheet, with all data you chose to download.
The columns in the spreadsheet are as follows:
Resource ID: The unique code that Datamint has for the annotated image or frame.
Resource Type: The format of the image that was annotated, such as DICOM or PNG.
Filename: The name of the image that was annotated.
Filepath: Where the annotated image or frame is stored in Datamint’s servers.
Original Filepath: The filepath that the image had when you uploaded it. This can be useful for integrating with legacy systems.
Identifier: The name of the annotation class.
Value: For labels and classifications, the selection the annotator made is shown in the spreadsheet here.
Annotator Email, Annotator Firstname, Annotator Lastname: The personal information of the annotator who made this annotation.
Edit
This button reopens the same window used to create a worklist, allowing you to make edits.
Generally, edits should only be used for small changes, like correcting spelling mistakes. For more major changes like gathering a different group of annotations, it is usually better to create a new worklist. This helps to more effectively track the work that is done.