Creating a Project
A Datamint project is for developing a model or set of models that perform a single medical task. For more information, see What is a Project?.
Projects Tab
The Projects tab on the Datamint homescreen looks like this:
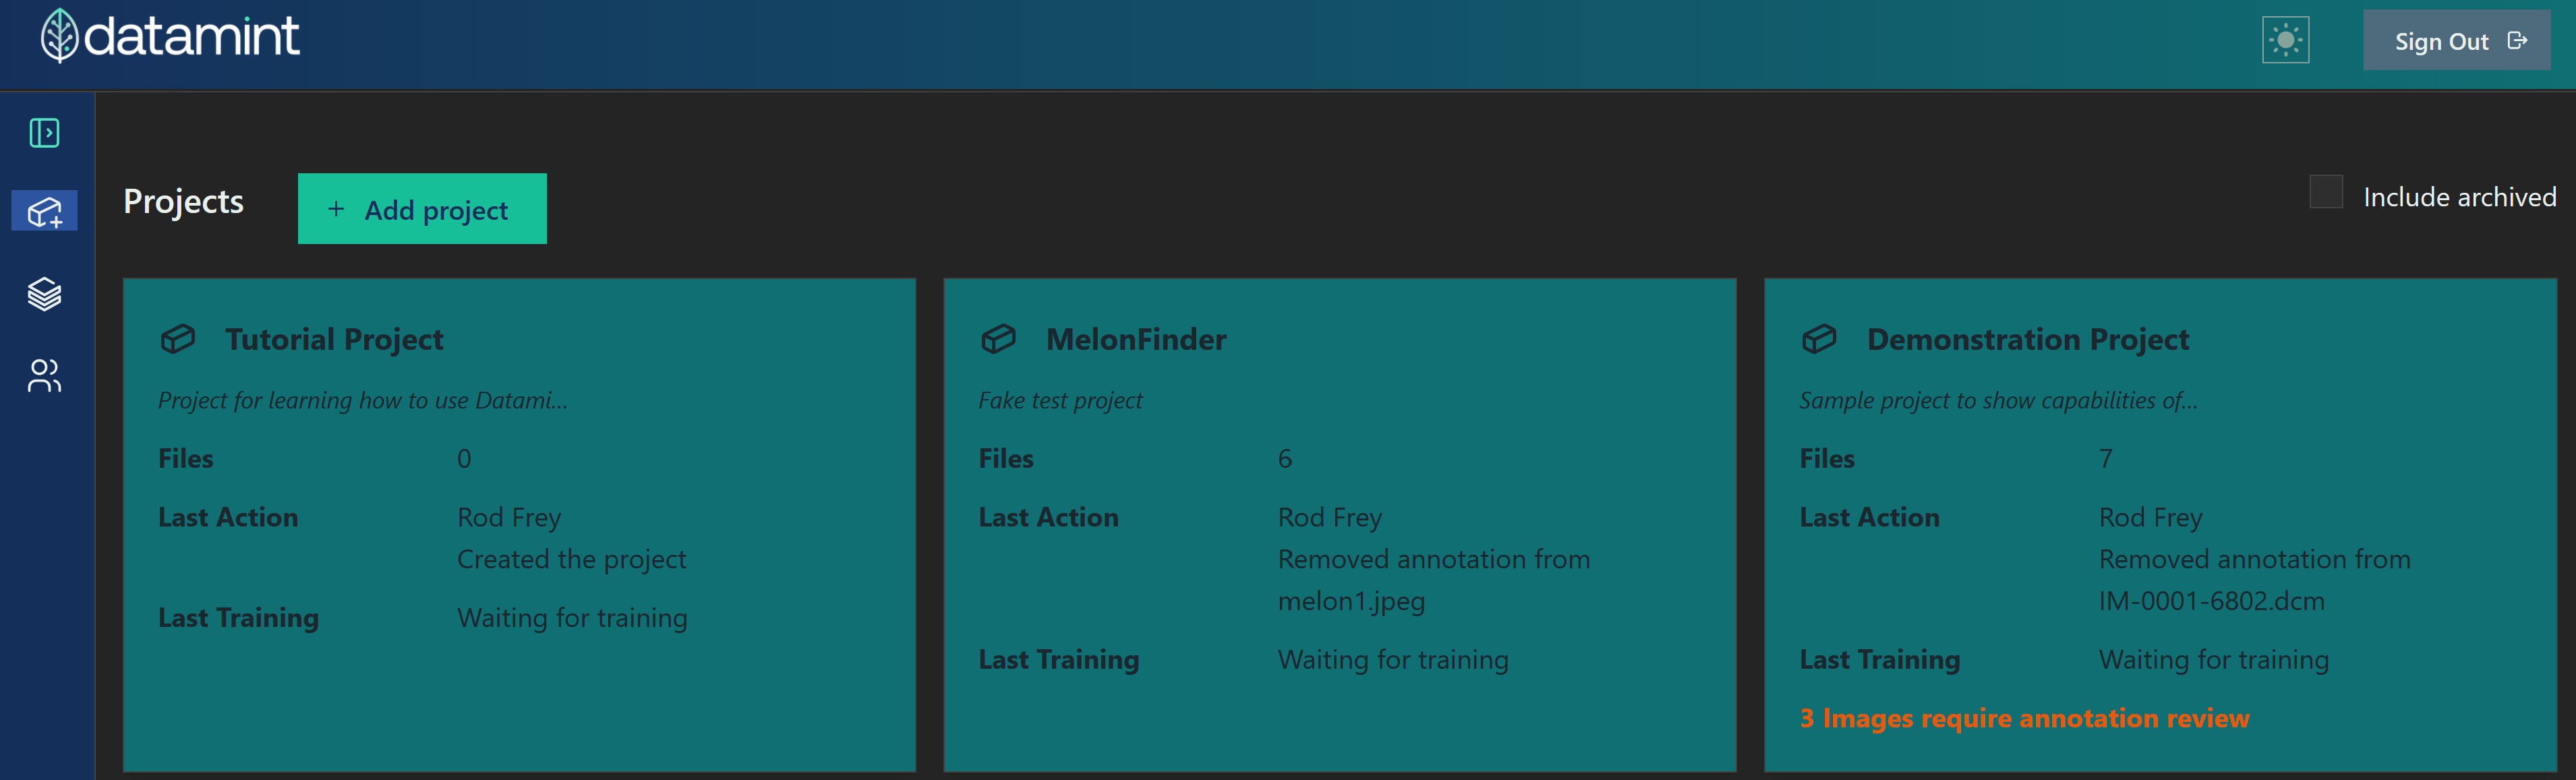
Each project is its own card. Click on them to view the project.
The Include Archived checkbox at the top right, when selected, will display cards for any projects you have archived.
The Add Project button allows you to create a new project.
New Project Screen
This screen is opened by pressing the Add Project button.
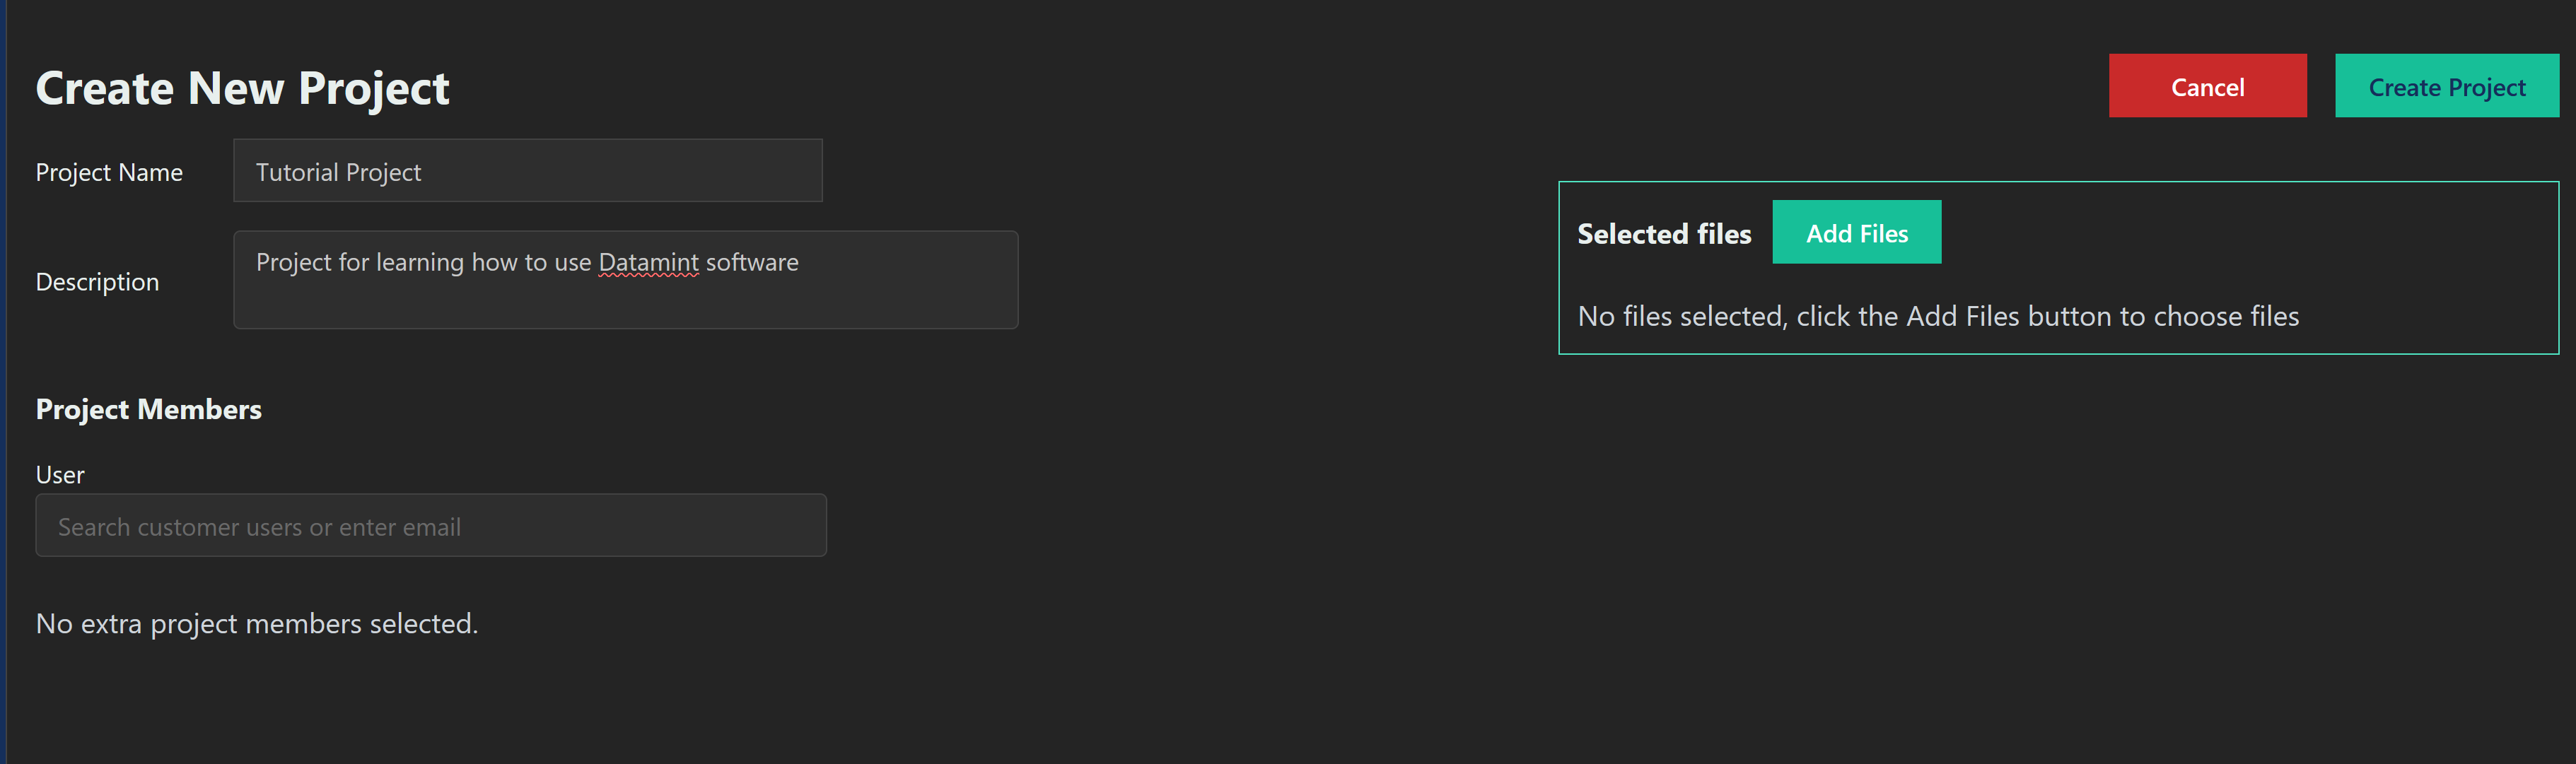
Project Name and Project Description will be displayed on the project card.
The box under Project Members allows you to enter email addresses to add people to the project. If they are already Datamint users they will be automatically added when you create the projects; if they are not, they will be automatically sent emails with links to create their Datamint accounts.
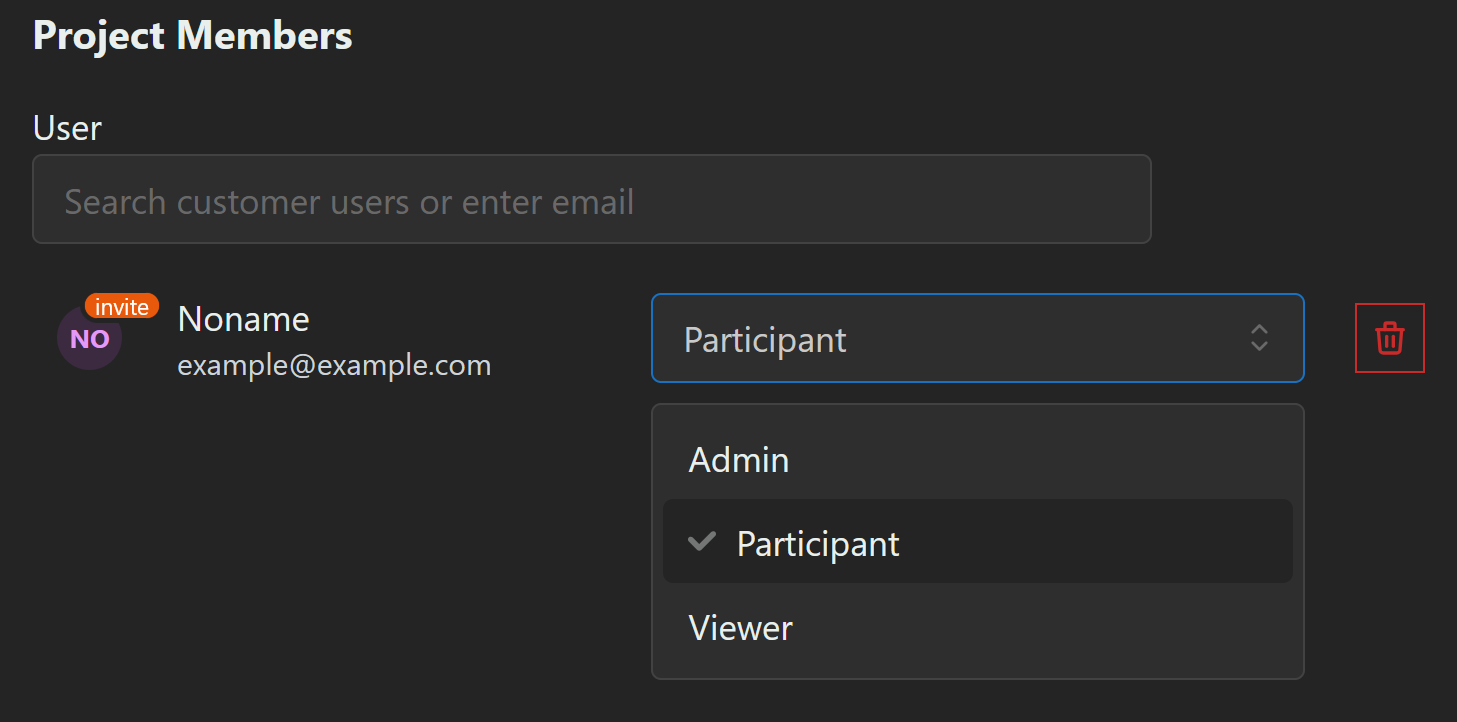
When you add someone, you can also set their role with the drop-down menu.
A Viewer has read-only access to the Summary, annotation status, uploaded files, and ongoing experiments. They cannot edit any part of the project. A Participant can view the project, upload files, and use the API. This is the appropriate role to give most collaborators. An Admin can also edit project settings.
Resource Selection
Click Add Files to open the Resource Selection window, which allows you to add files from your Data Library. The Data Library contains all the files you have uploaded to Datamint, regardless of which project they were assigned to. For more information, see What is the Data Library?.
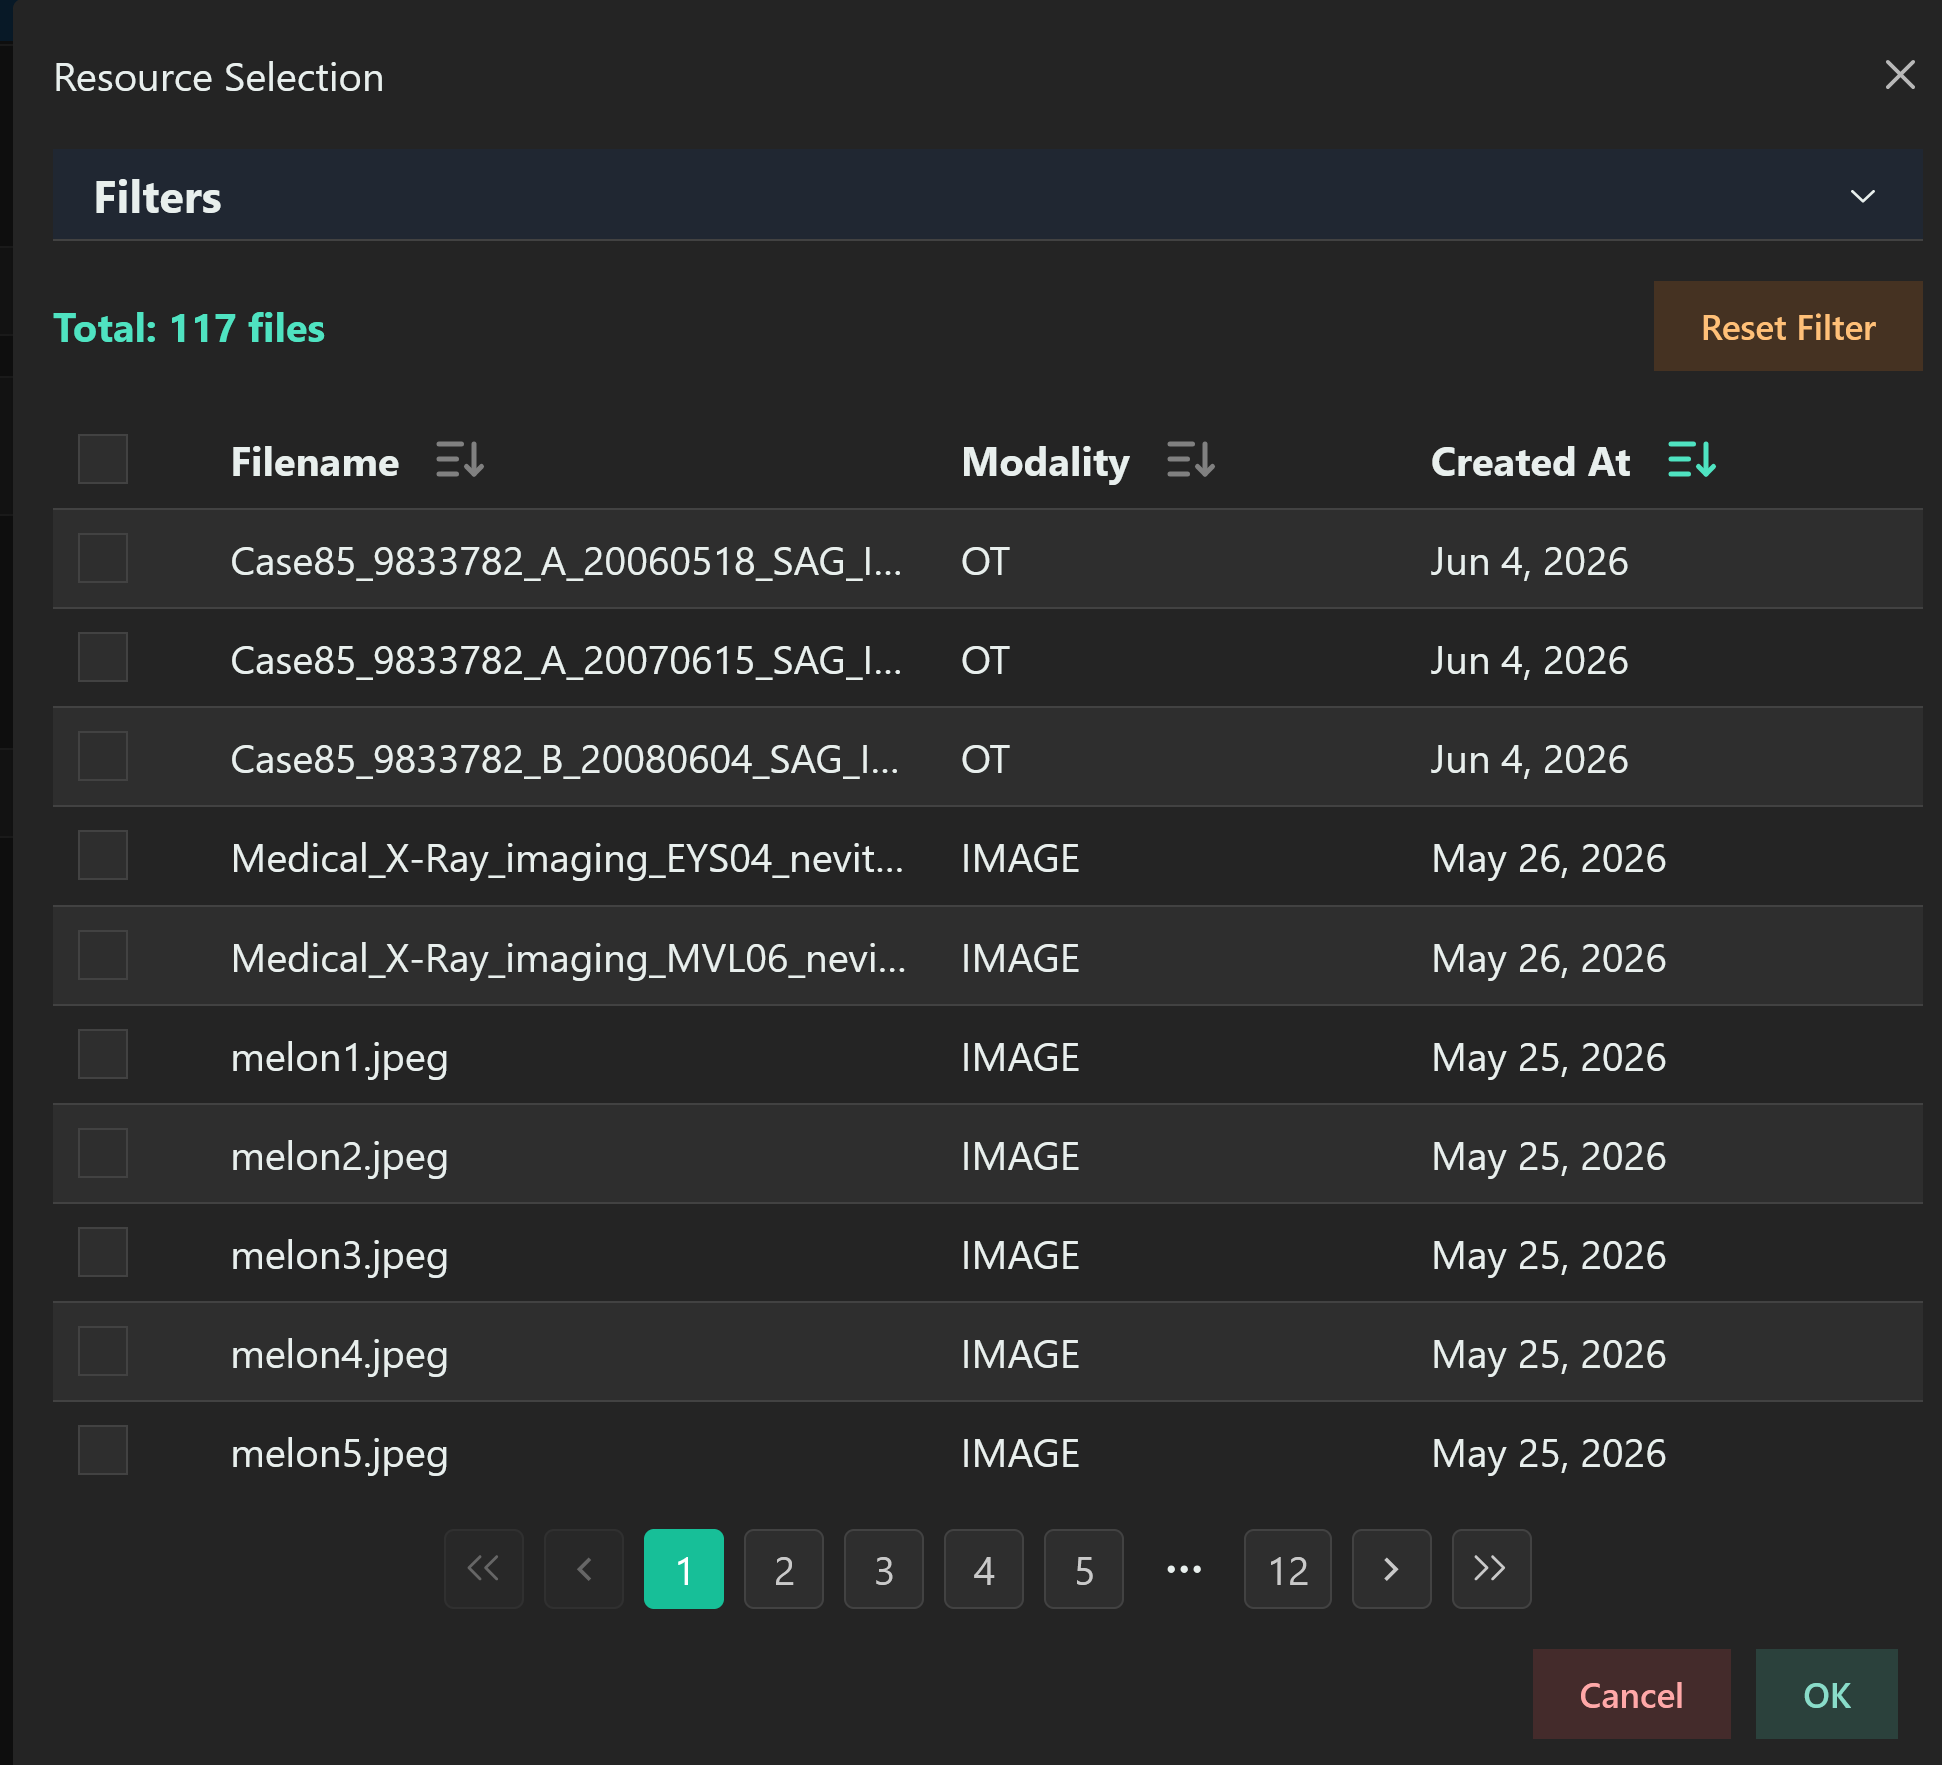
Files in your Library are listed by default with the most recently-added files first. By clicking on the column titles (Filename, Modality, or Created At), you can sort alphabetically, by scan modality, or by date added respectively. Click a second time to sort in reverse order.
You can select files by ticking the checkbox: they will then be added to the project.
Click on the Filters collapsible to open it. Information about how to use the filters can be found at Filters.