Published Files
The Published Files tab shows all of the files in your Data Library, regardless of which project(s) they are associated with. This means every file you’ve uploaded to Datamint can be seen in the Published Images tab.
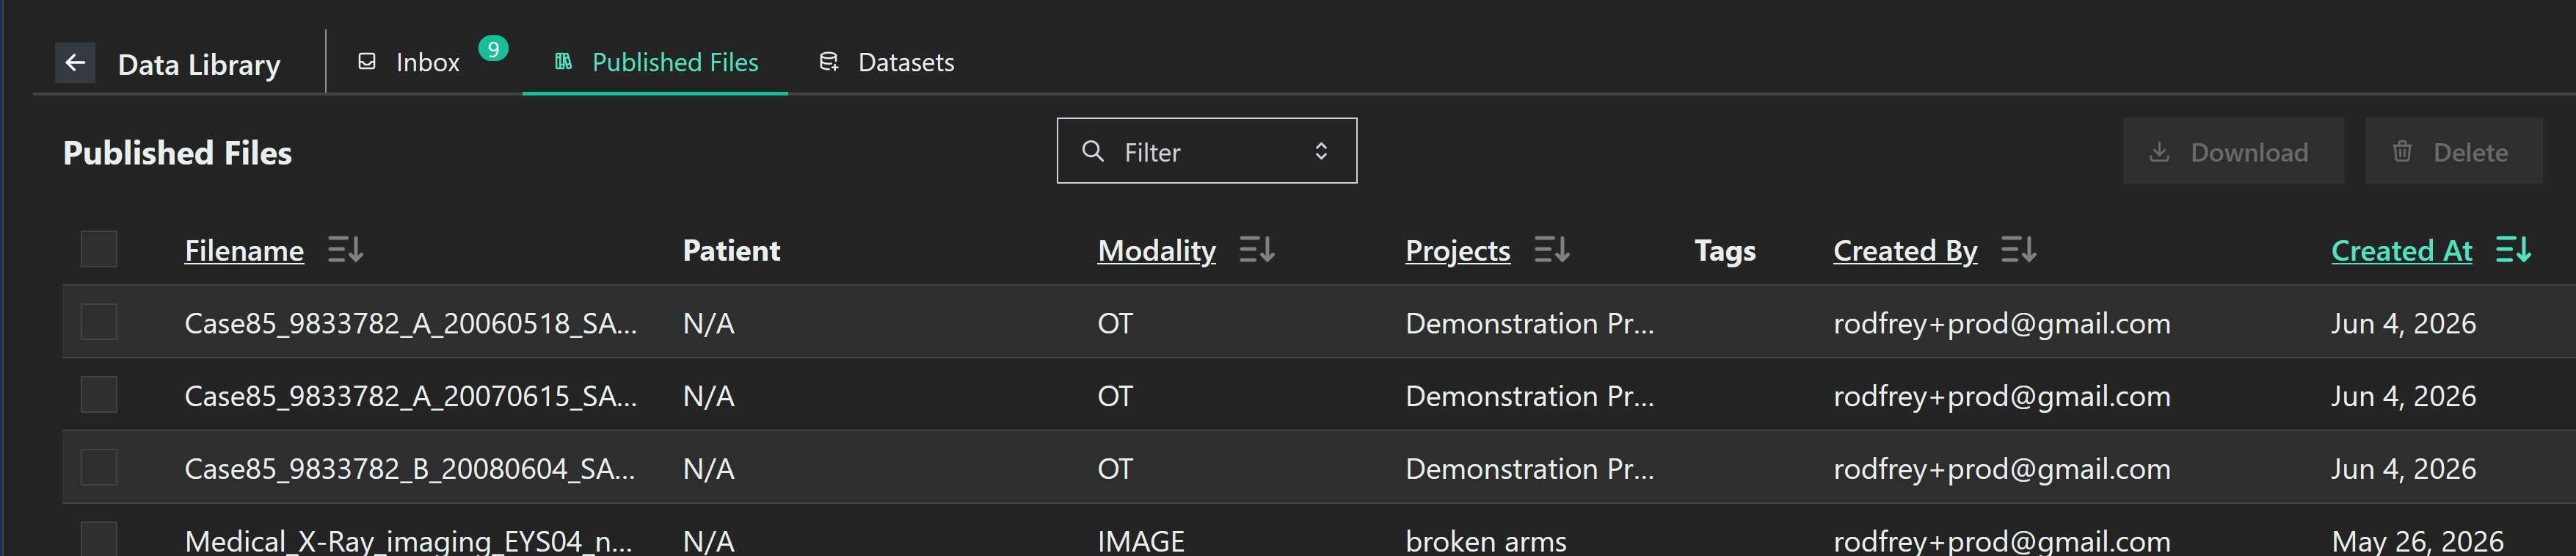
By default, they are listed with the most recently-added files first. By clicking on the column titles (Filename, Modality, Projects, Created By, and Created At), you can sort alphabetically, by scan modality, by projects the file is in, by the person who uploaded the file, and the time it was uploaded respectively. Click a second time to sort in reverse order.
You can select files by ticking the checkbox. The top checkbox selects everything on the page, and gives you the option to select all files across all pages.
Filters
Press the Filter button to open the filter menu.
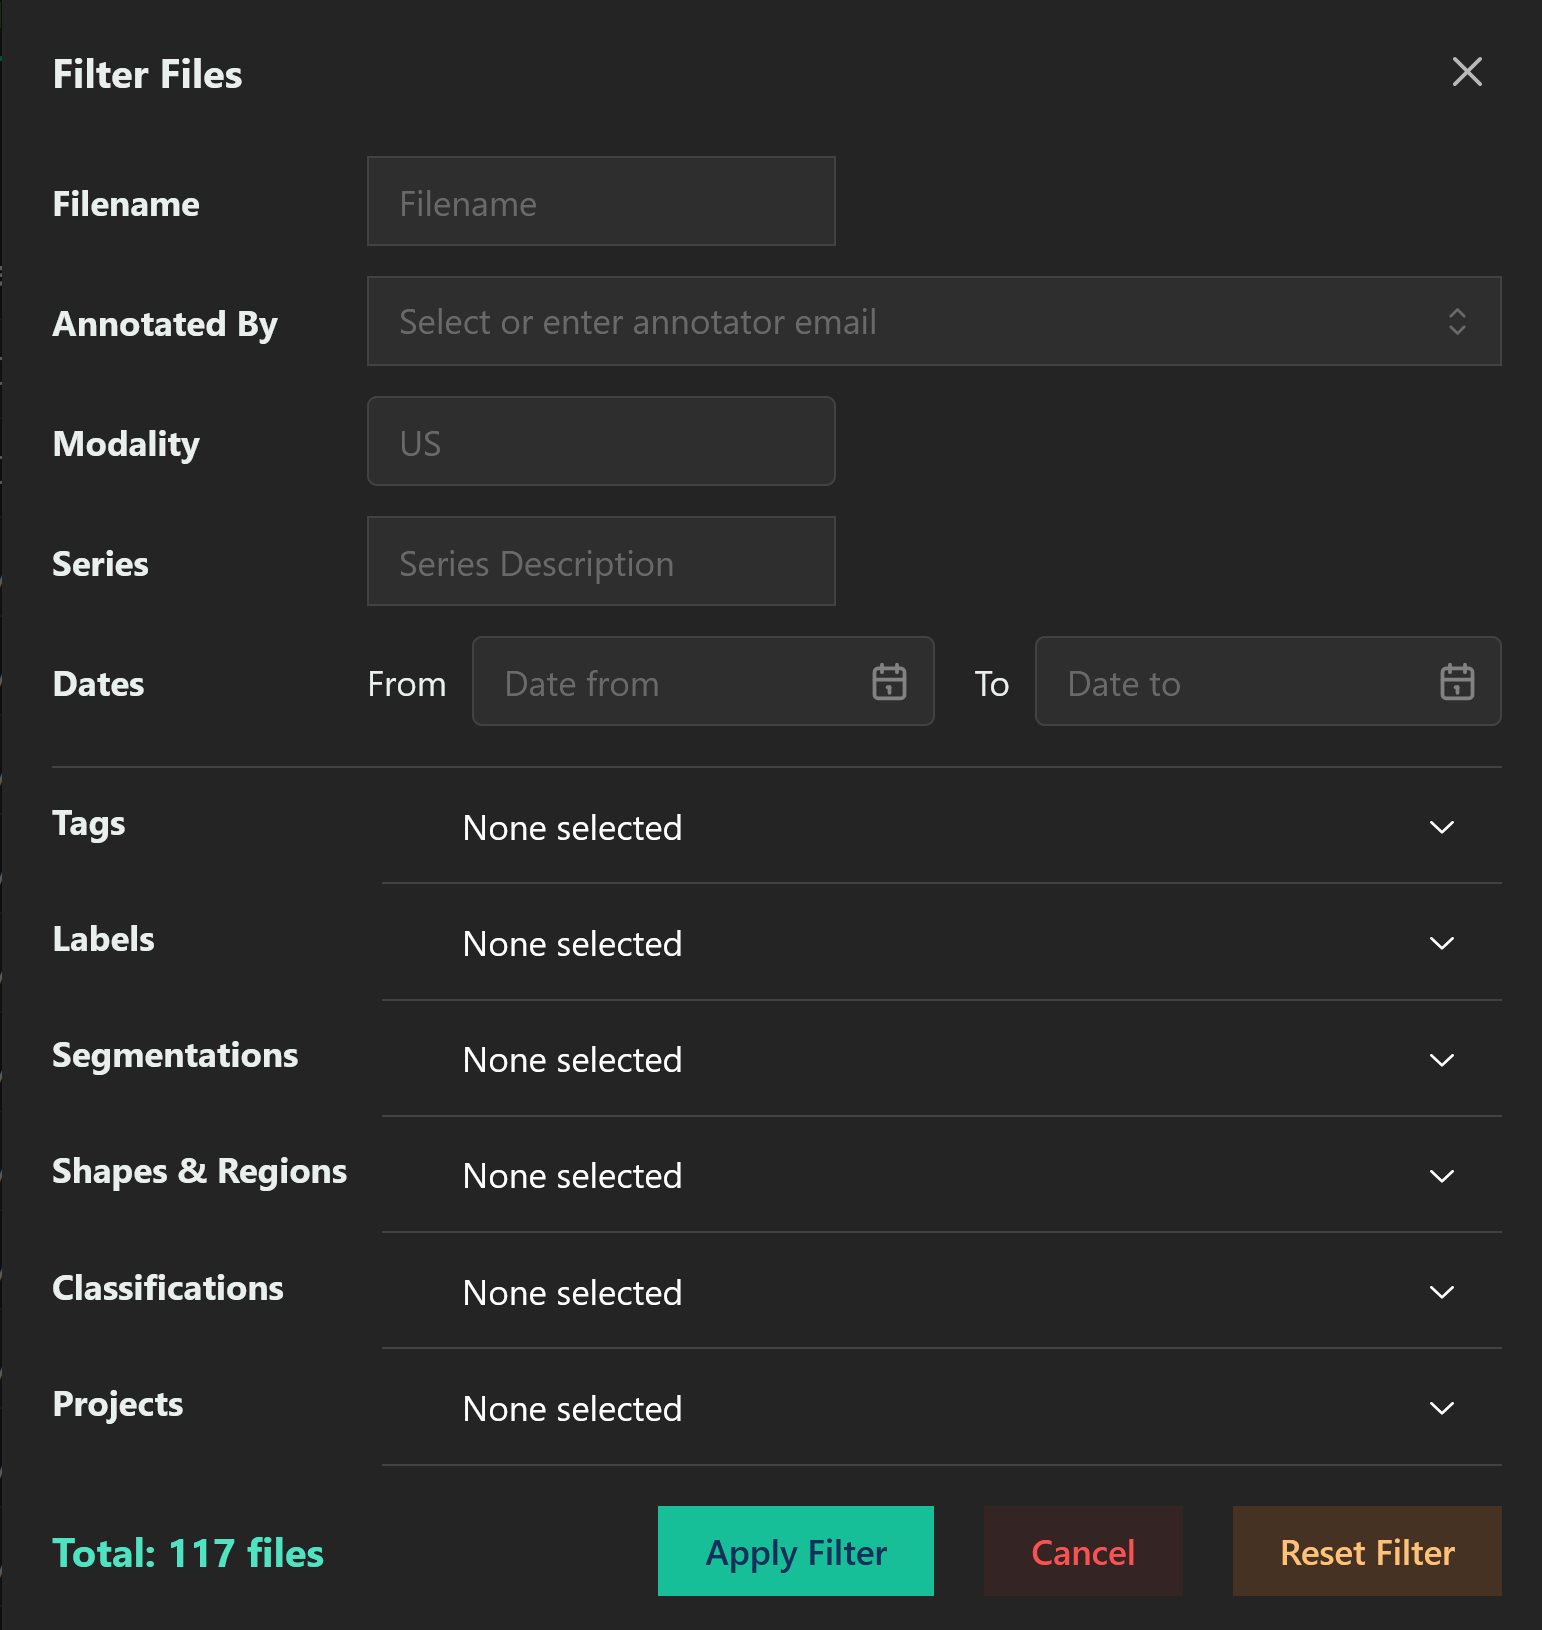
You can use the filters to select all of the files in the Data Library which satisfy some requirements. Once you’ve used filters to select only the relevant files, you can use the “Select All” checkmark, and it will only select the files that are displayed. The “Reset Filter” button clears filters, displaying all files in the Data Library once again.
If you use multiple filters at the same time, it will only display files that satisfy all of the requirements.
Filename
Filters by the name of the file. You do not need to enter the entire filename: it will show all files with partial matches. For instance, if you type in “X-Ray”, you will see all files in the Data Library with “X-Ray” in the filename.
Annotated By
Enter email addresses of collaborators. Only files which were annotated by at least one of the people entered will be shown.
Modality
Only files made using the entered modality will be shown. Note that unlike the filename, you must enter the entire modality. They are also case-senstitive.
Series Description
If your files have a DICOM series description, you can filter for them here. Like filenames, you only need to enter part of the description.
Dates
Use the calendar widgets to enter a date range. Only files which were uploaded within that range will be displayed.
Labels
This allows you to select files which were assigned a certain label in an annotation worklist. Note that this has nothing to do with whether the specific file actually fit the label. For example, if an annotation worklist asked annotators to identify files which were “diseased”, all files on that worklist have the “diseased” label, even the healthy ones.
By default, if you select several labels, only files which were assigned all the labels are selected. The buttons at the bottom allow you to instead select all files which were assigned any of the labels, including those which weren’t assigned all of them.
Segmentations
Select files which were annotated with specific segmentation titles. Works the same way as Labels.
Geometries
Select files which were annotated with specific titles of shapes and regions. Works the same way as Labels.
Classifications
Select files which were classified with specific category sets. Works the same way as Labels.
Projects
Select files which belong to a certain project. Like with Labels, you can select several projects, and then choose whether to sh all files in any of the projects, or only files which appear in all the selected projects.
Download
The Download button allows you to download the selected files. Currently, if you wish to download the annotations associated with the files, you must do so from the Files tab in the project. For more information, see Downloading Annotation Data.